Making handmade wooden toy cars is a popular DIY activity that combines creativity and craftsmanship. Handmade wooden toy cars are miniature versions of real cars, intricately crafted from wood materials. The charm of these toys lies in their uniqueness and the ability to customize them according to individual preferences. This engaging DIY project not only provides a fun activity for leisure time but also offers several benefits, such as enhancing fine motor skills, fostering creativity, and promoting sustainability through the use of natural materials.
In this article, we will explore the fascinating world of making handmade wooden toy cars. We will delve into the step-by-step process of creating these miniature masterpieces, from selecting the appropriate wood to applying the finishing touches. Additionally, we will discuss various design ideas and customization options that will allow you to add a personal touch to your wooden toy cars. Lastly, we will provide essential tips and tricks to ensure a successful and enjoyable DIY experience. Stay tuned to discover the key takeaways and unleash your inner craftsman!
Key Takeaways
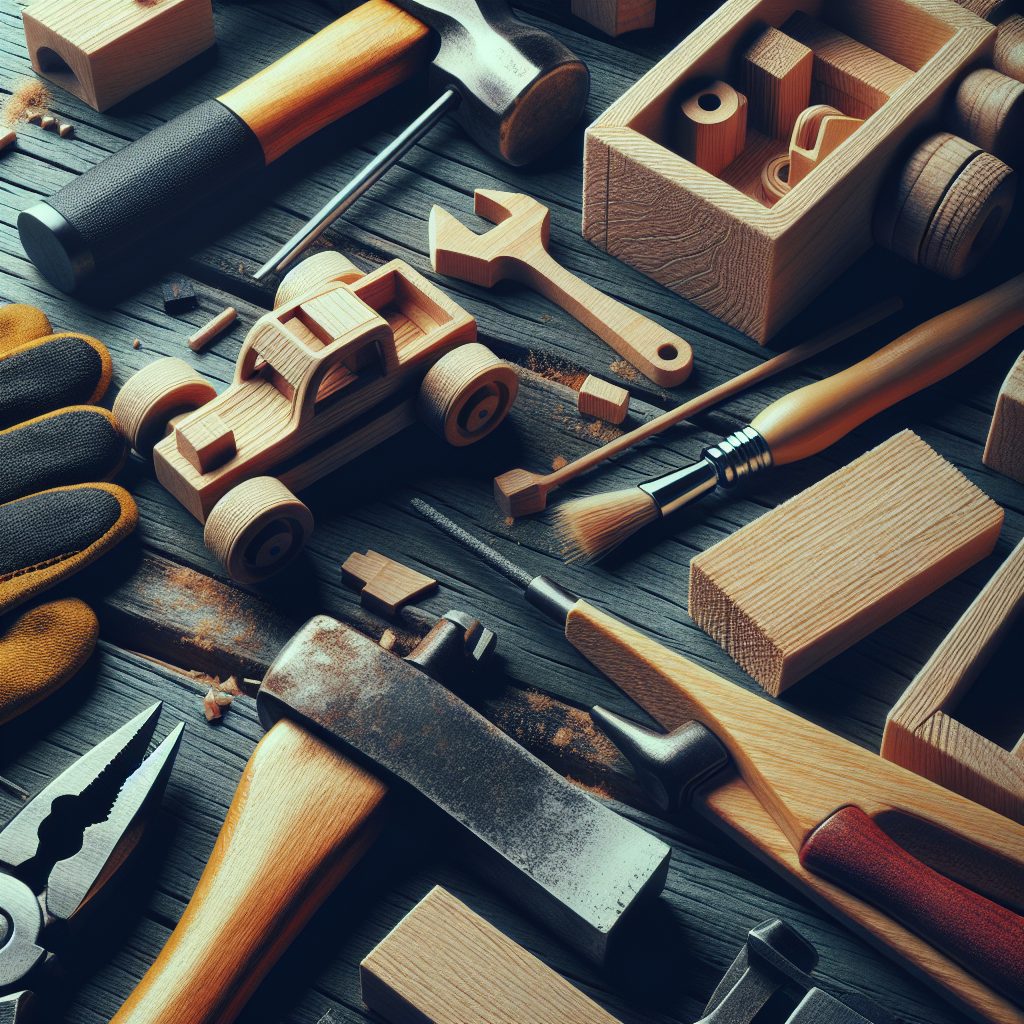
1. Start by gathering the necessary materials, including blocks of wood, sandpaper, hand tools, and non-toxic paint or varnish to create unique handmade wooden toy cars.
2. Carefully measure, mark, and cut the wood blocks to the desired dimensions using a saw. Sand down any rough edges or surfaces to ensure a smooth finish.
3. Use a combination of hand tools such as chisels, files, and sandpaper to shape the wood blocks into car bodies, wheels, and other components. Take your time and be precise to achieve the desired design.
4. Once the basic shapes are ready, add fine details such as windows, headlights, and other embellishments using carving tools or small drills. This will enhance the overall look of the toy cars.
5. Finally, apply non-toxic paint or varnish to protect the wood and give the toy cars a vibrant finish. Allow sufficient drying time before handing them to children for safe play and enjoyment.
How to Make Handmade Wooden Toy Cars: A Comprehensive DIY Guide
Gathering the Materials
The first step in creating your own wooden toy cars is to gather all the necessary supplies. You will need:
- High-quality block of wood
- Saw
- Sandpaper
- Drill
- Paints and brushes
- Wood glue
- Wheels
- Axle pegs
- Decorative accessories (optional)
Once you have all the materials, you’re ready to start building!
Designing the Car
Before cutting the wood, it’s essential to have a solid design in mind. Consider the type of car you want to create and sketch it on paper. Think about the shape, size, and overall aesthetic appeal. This is your chance to get creative and make your wooden toy car truly unique!
Cutting and Sanding
Using a saw, carefully cut the block of wood according to your design. Smooth out rough edges and surfaces using sandpaper. Pay attention to details and ensure that the toy car is safe for children to play with by sanding any sharp corners or rough spots.
Drilling the Holes
The next step is to drill holes in the body of the car to attach the wheels and axle pegs. Measure the appropriate locations for the holes based on the desired wheelbase and drill them using an appropriately sized drill bit. Be precise to ensure proper wheel alignment.
Assembling the Car
Apply wood glue to the axle pegs and insert them into the drilled holes. Then, attach the wheels to the axle pegs. Allow the glue to dry completely before proceeding to the next step. This step is crucial to ensure the sturdiness and durability of the toy car.
Painting and Decorating
Once the wooden car is assembled, it’s time to let your creativity shine. Paint the car using non-toxic, child-friendly paints. Consider adding decorative elements such as stripes, patterns, or stickers to make the car visually appealing. Remember to let the paint dry completely before handling the toy car.
Adding Finishing Touches
If desired, you can enhance the toy car by adding additional details like headlights, windows, or a steering wheel. Use small wooden pieces and glue them securely in place. Make sure any additional parts are safe for children and won’t pose a choking hazard.
Tips for a Successful DIY Wooden Toy Car
- Choose high-quality wood that is easy to work with and won’t warp over time.
- Always prioritize safety by sanding and rounding any sharp edges or corners.
- Let the wood glue dry fully before moving on to the next step to ensure a strong bond.
- Use child-friendly, non-toxic paints and finishes for the safety of young children who may play with the toy car.
- Consider adding a clear coat or sealant to protect the paint and extend the lifespan of the toy car.
- Encourage children to get involved in the process and unleash their creativity by allowing them to help with the painting and decorating.
FAQ – DIY Guide to Making Handmade Wooden Toy Cars
1. Can I use any type of wood for making toy cars?
Yes, you can use a variety of woods such as pine, maple, or birch for making wooden toy cars. Just make sure that the wood is smooth and without any splinters to ensure the safety of children.
2. How can I get started with making wooden toy cars?
To get started, you will need basic woodworking tools like a saw, sandpaper, drill, and glue. Additionally, gather the necessary materials such as wooden blocks, wheels, axles, and paint for decoration.
3. Are there any safety precautions I should take when making wooden toy cars?
Yes, it’s important to wear protective gear like goggles and gloves while working with tools. Make sure to keep sharp objects away from children and supervise them closely during the crafting process.
4. How can I ensure the toy cars are safe for children to play with?
Make sure to sand all the edges and surfaces of the wooden cars to prevent any potential splinters. Use non-toxic paints and finishes that are safe for children. Avoid small parts that could be a choking hazard.
5. Can I personalize the wooden toy cars?
Absolutely! You can personalize the toy cars by painting them with different colors, adding designs or patterns, or even using decals. Let your creativity shine!
6. How long does it take to make a wooden toy car?
The time required to make a wooden toy car depends on the complexity of the design and your skill level. On average, it can take a few hours to a couple of days to complete a handmade wooden toy car.
7. Where can I find templates or patterns for wooden toy cars?
You can find templates and patterns for wooden toy cars online on various woodworking websites or even in crafting books. Additionally, you can create your own designs based on your imagination.
8. Can I sell the wooden toy cars I make?
Yes, you can sell the wooden toy cars you make. However, it’s essential to check the regulations and safety standards in your country or locality to ensure compliance before selling them.
9. Are there any additional resources or tutorials available for making wooden toy cars?
Yes, there are numerous resources available online, such as video tutorials, step-by-step guides, and forums where you can find helpful tips and techniques for making wooden toy cars.
10. Can I make wooden toy cars with my kids as a fun family activity?
Absolutely! Making wooden toy cars can be a fantastic family activity that promotes creativity, teamwork, and bonding. Just make sure to supervise children during the crafting process and provide age-appropriate tasks.
Final Thoughts – DIY Guide to Making Handmade Wooden Toy Cars
Creating handmade wooden toy cars can be an incredibly rewarding experience. Not only do they provide a unique and personalized toy for children, but they also encourage imaginative play and promote fine motor skills. By following a DIY guide, you have the opportunity to unleash your creativity and craft a cherished toy that will be treasured for years to come.
Remember, making wooden toy cars is not just about the end result; it’s about the process itself. Enjoy the journey of woodworking, explore different designs, and embrace any imperfections that add character to your creations. Whether you’re making these toy cars for your own kids, as gifts, or even for sale, the joy of handcrafting something special cannot be overstated. So grab your tools, gather your materials, and embark on a delightful adventure of making handmade wooden toy cars!