Designing Handcrafted Wooden Dollhouses: A DIY Journey is an engaging and fulfilling endeavor that allows individuals to tap into their creativity and explore their passion for carpentry. The term “handcrafted” refers to the process of creating something with one’s own hands, emphasizing the artisanal nature of this craft. It involves designing and constructing wooden dollhouses from scratch, resulting in unique and personalized creations.
One unique aspect of designing handcrafted wooden dollhouses is the immense satisfaction that comes from creating something tangible and meaningful. Unlike mass-produced dollhouses, each handcrafted piece is infused with the creator’s personal touch and attention to detail. This not only lends a distinctive character to the dollhouse but also reflects the maker’s artistic vision and skill.
Designing handcrafted wooden dollhouses also offers a plethora of design possibilities and customization options. From selecting the wood type to choosing the color palette and decor elements, every aspect of the dollhouse can be tailored to the maker’s taste. This allows for a truly individualized creation that can be enjoyed for years to come.
In the upcoming sections of this article, we will delve into the key takeaways of embarking on a DIY journey to design handcrafted wooden dollhouses. We will explore the essential tools and materials necessary for the task, provide step-by-step guidance on constructing the dollhouse frame and furniture, as well as offer tips for decorating and adding intricate details. By the end, you will be equipped with the knowledge and inspiration to begin your own rewarding journey of designing handcrafted wooden dollhouses. So, let’s delve into the world of miniature craftsmanship and unleash our creativity!
Key Takeaways
1. The article explores the process and steps involved in designing handcrafted wooden dollhouses, providing a valuable DIY journey for enthusiasts. It emphasizes the importance of careful planning, proper measurements, and using high-quality materials to ensure a successful project.
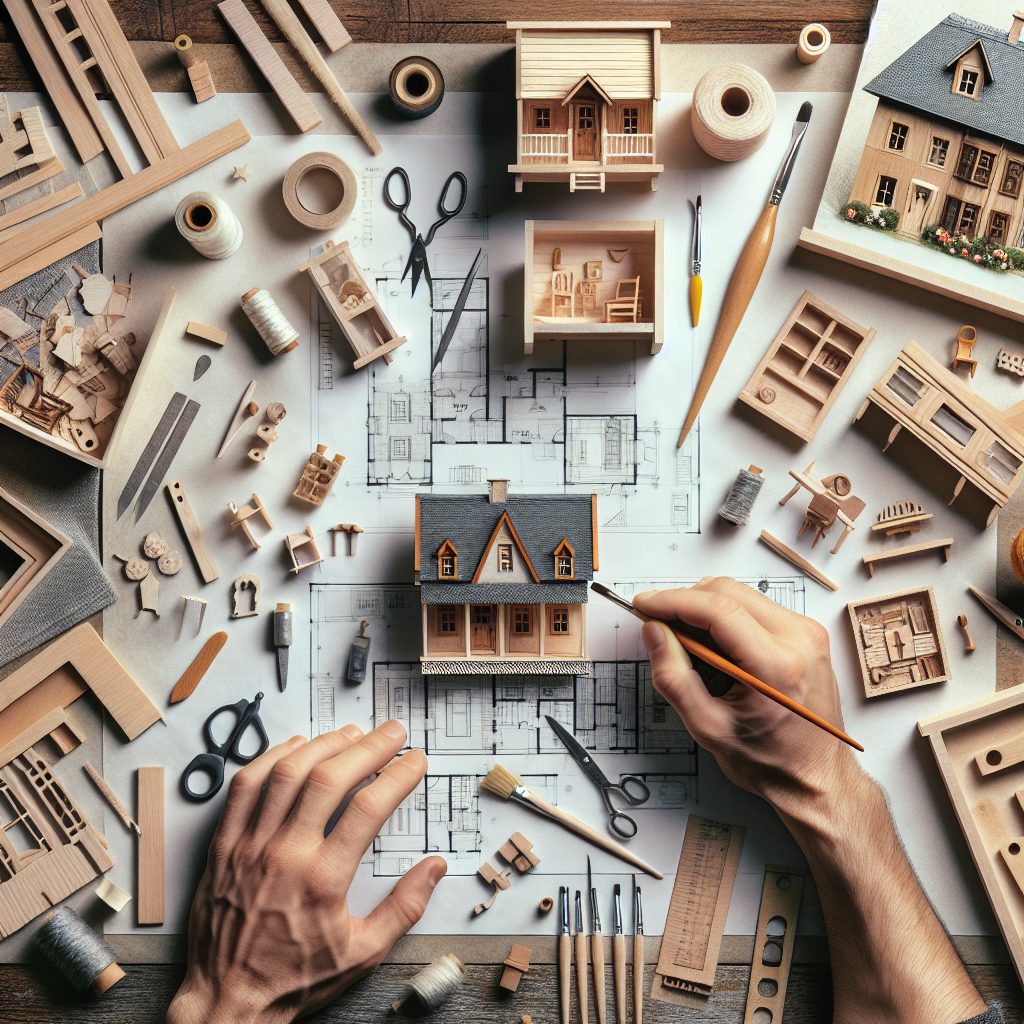
2. The author stresses the significance of creating a detailed design and blueprints before starting construction. This step helps to visualize the final product, make necessary adjustments, and ensure that every aspect of the dollhouse is well thought out.
3. The article highlights the importance of precise measurements and accurate cuts when working with wood. It advises using a variety of tools such as a miter saw, table saw, and coping saw to achieve clean cuts and seamless joints, ultimately resulting in a polished and professional finish.
4. In discussing the interior design of dollhouses, the article suggests focusing on elements such as wallpaper, flooring, and furniture to create a realistic and personalized space. It provides tips on selecting suitable accessories, materials, and fabrics to enhance the overall aesthetic appeal.
5. Lastly, the author places great emphasis on patience, perseverance, and attention to detail throughout the entire design and construction process. By paying close attention to even the smallest details and being willing to put in the necessary time and effort, enthusiasts can create stunning and cherished handcrafted wooden dollhouses.
What are the Essential Steps for Designing Handcrafted Wooden Dollhouses: A DIY Journey?
Materials and Tools Needed
Before diving into the process of designing handcrafted wooden dollhouses, it is essential to gather the necessary materials and tools. These might include wood boards, a saw, sandpaper, paint, glue, miniature furniture, and decorations. Having these items ready will ensure a smooth DIY journey.
Design Planning
The first step in the designing process is to create a clear plan and concept for the dollhouse. Consider the size, layout, and style you want to achieve. You can sketch your ideas on paper or utilize software to create a virtual model. Planning ahead will save time and prevent mistakes during the construction phase.
Cutting and Assembling
Once the design plan is ready, it’s time to start cutting and assembling the wooden pieces. Use a saw to cut the wood boards according to the measurements outlined in your design. Take extra care to ensure accurate cuts for a precise fit later on. Assemble the pieces using glue or nails, following your design plan step by step.
Sanding and Smoothing
After the dollhouse structure is assembled, it’s crucial to sand down the rough edges and surfaces. Use sandpaper to smooth out any imperfections, ensuring a polished finish. Pay attention to areas where different wooden pieces meet for a seamless look. Sanding will also prepare the surfaces for painting or staining.
Finishing Touches
With the dollhouse structure complete, it’s time to add the finishing touches. Paint the exterior and interior walls according to your desired color scheme. You can also apply wallpapers or decals for a more intricate design. Install flooring, windows, and doors to bring the dollhouse to life. Add miniature furniture, decorations, and accessories to personalize the space.
Adding Lighting and Final Details
To enhance the ambiance of your dollhouse, consider incorporating lighting elements. Attach miniature LED bulbs or use battery-operated lights to illuminate specific areas. Additionally, add final details such as curtains, rugs, and curtains to create a cozy and realistic atmosphere.
Maintenance and Care
Once your handcrafted wooden dollhouse is complete, it’s important to maintain and care for it properly. Regularly dust the surfaces and clean the interior to keep it looking pristine. Avoid exposing the dollhouse to excessive moisture or extreme temperatures, as it may damage the wood or paint. With proper care, your dollhouse can be enjoyed for years to come.
What are Some Tips for Designing Handcrafted Wooden Dollhouses?
- Start with a detailed design plan to avoid mistakes during construction.
- Use high-quality materials for a durable and long-lasting dollhouse.
- Take your time and pay attention to the details for a polished end result.
- Experiment with different painting techniques and colors to achieve the desired aesthetic.
- Utilize online resources and tutorials for inspiration and guidance throughout the DIY journey.
- Consider incorporating functional elements such as working doors or removable sections for easy access.
- Personalize the dollhouse with unique accessories and decorations to make it truly one-of-a-kind.
Frequently Asked Questions
1. How do I start designing a handcrafted wooden dollhouse?
To begin designing a handcrafted wooden dollhouse, first gather inspiration from various sources such as magazines, online blogs, or even real homes. Sketch out your ideas and create a rough blueprint. Then, begin selecting suitable materials, tools, and furniture for your dollhouse.
2. What types of wood are commonly used for handcrafted wooden dollhouses?
The most commonly used types of wood for handcrafted wooden dollhouses include plywood, balsa wood, basswood, and pine. These types of wood are durable, easy to work with, and can be easily stained or painted to achieve the desired finish.
3. What tools are essential for designing a handcrafted wooden dollhouse?
Some essential tools for designing a handcrafted wooden dollhouse include a circular saw or a handsaw, a miter saw, sandpaper, wood glue, a drill, and various sizes of clamps. These tools will help you in cutting the wood, shaping it, assembling the parts, and adding finishing touches to your dollhouse.
4. How can I ensure the structural stability of my handcrafted wooden dollhouse?
To ensure the structural stability of your handcrafted wooden dollhouse, make sure to follow the blueprint and instructions carefully. Use strong and reliable joinery techniques such as using dowels, screws, or biscuits to connect the wooden parts securely. Additionally, reinforce critical areas like corners, floors, and roof with supportive brackets or additional wood pieces.
5. Can I customize the design of my handcrafted wooden dollhouse?
Absolutely! One of the advantages of designing a handcrafted wooden dollhouse is the freedom to customize it according to your preferences. From choosing the color scheme to adding unique architectural elements, the design possibilities are endless. Let your creativity flow and make it a one-of-a-kind dollhouse.
6. How long does it take to complete a handcrafted wooden dollhouse?
The time required to complete a handcrafted wooden dollhouse depends on the complexity of the design, your skill level, and the amount of time you can dedicate to the project. It can range from a few days for a simple design to several weeks or even months for a more intricate and detailed dollhouse.
7. Can children participate in designing a handcrafted wooden dollhouse?
Absolutely! In fact, involving children in designing a handcrafted wooden dollhouse can be a great way to spend quality time together and nurture their creativity. Make sure to supervise them and provide age-appropriate tools and materials for their involvement.
8. How can I choose the right scale for my handcrafted wooden dollhouse?
Choosing the right scale for your handcrafted wooden dollhouse depends on personal preference and the types of dolls or furniture you plan to use. Common scales for dollhouses include 1:12 and 1:24, where 1 inch represents 1 foot or 1/2 inch represents 1 foot, respectively. Consider the size of your dolls and furniture to determine the appropriate scale.
9. Are there any safety precautions I should consider while designing a handcrafted wooden dollhouse?
Yes, safety should be a top priority. Always wear protective gear such as safety goggles and gloves when working with tools or chemicals. Work in a well-ventilated area to avoid inhaling fumes from paints or adhesives. Keep sharp tools out of children’s reach and store them properly when not in use.
10. How can I make my handcrafted wooden dollhouse more realistic?
To make your handcrafted wooden dollhouse more realistic, pay attention to details. Add small accessories such as miniature plants, rugs, curtains, and lighting fixtures. Incorporate realistic paint finishes, wallpaper, and flooring materials. Use your imagination to create a lifelike environment within your dollhouse.
Final Thoughts
Designing a handcrafted wooden dollhouse can be a truly rewarding DIY journey. The process allows you to unleash your creativity, develop woodworking skills, and create a unique miniature world for your dolls. Remember to take your time, enjoy the process, and don’t be afraid to experiment with different ideas and techniques.
Whether you’re building a dollhouse for play or display, the satisfaction of seeing your vision come to life is unparalleled. Each completed dollhouse becomes a cherished work of art that can be admired for generations. So, start your DIY journey today and let your imagination guide you as you design the perfect handcrafted wooden dollhouse.