When it comes to wooden toy assembly, DIY makers crave tips and tricks to ensure that their projects come together seamlessly. Whether you are a beginner or an experienced woodworker, understanding the essential techniques can make all the difference in creating safe and sturdy toys for children. Interestingly, wooden toys have been enjoyed for centuries, with their timeless appeal and durability. This historical background alone highlights the significance of mastering proper assembly techniques to ensure the longevity and quality of these cherished playthings.
Now that you have a glimpse into the fascinating world of wooden toy assembly, let’s delve into some key takeaways that will empower you as a DIY maker. From choosing the right wood and tools to understanding crucial joinery techniques, each aspect plays a critical role in creating functional and safe toys. By the end of this article, you will gain valuable insights into the step-by-step process of assembling wooden toys and uncover tips to enhance the overall quality and craftsmanship of your creations. So, let’s embark on this journey together and discover the fundamental techniques required to bring your wooden toys to life. Stay tuned!
Key Takeaways
1. Choose quality and safe materials: When assembling wooden toys, it is crucial to start with high-quality materials that are safe for children. This means using non-toxic paints, varnishes, and glues, as well as selecting sturdy and durable wood options.
2. Accurate measurements and proper planning: Before starting the assembly process, it is essential to carefully measure and plan each component of the toy. Precision in measurements will ensure that the toy is safe and functional, with all parts fitting together seamlessly.
3. Patience and attention to detail: Assembling wooden toys requires patience and meticulousness. It’s important to pay close attention to the instructions, take your time in each step, and double-check that all pieces are properly aligned before moving forward. Rushing through the process may result in mistakes or a subpar final product.
4. Utilize appropriate tools and techniques: To streamline the assembly process and achieve the best results, using the right tools and techniques is crucial. Different types of saws, sanding tools, clamps, drills, and screws may be necessary depending on the specific toy. Understanding and mastering these tools and techniques will ensure that the toy is well-crafted and safe.
5. Test and refine: Once the assembly is complete, it is important to thoroughly test the functionality and safety of the toy. Check for any loose parts or potential hazards that could harm children. If necessary, make adjustments and refinements until the toy is completely safe and reliable.
What are the best SEO optimized assembly tips for DIY makers to follow when assembling wooden toys?
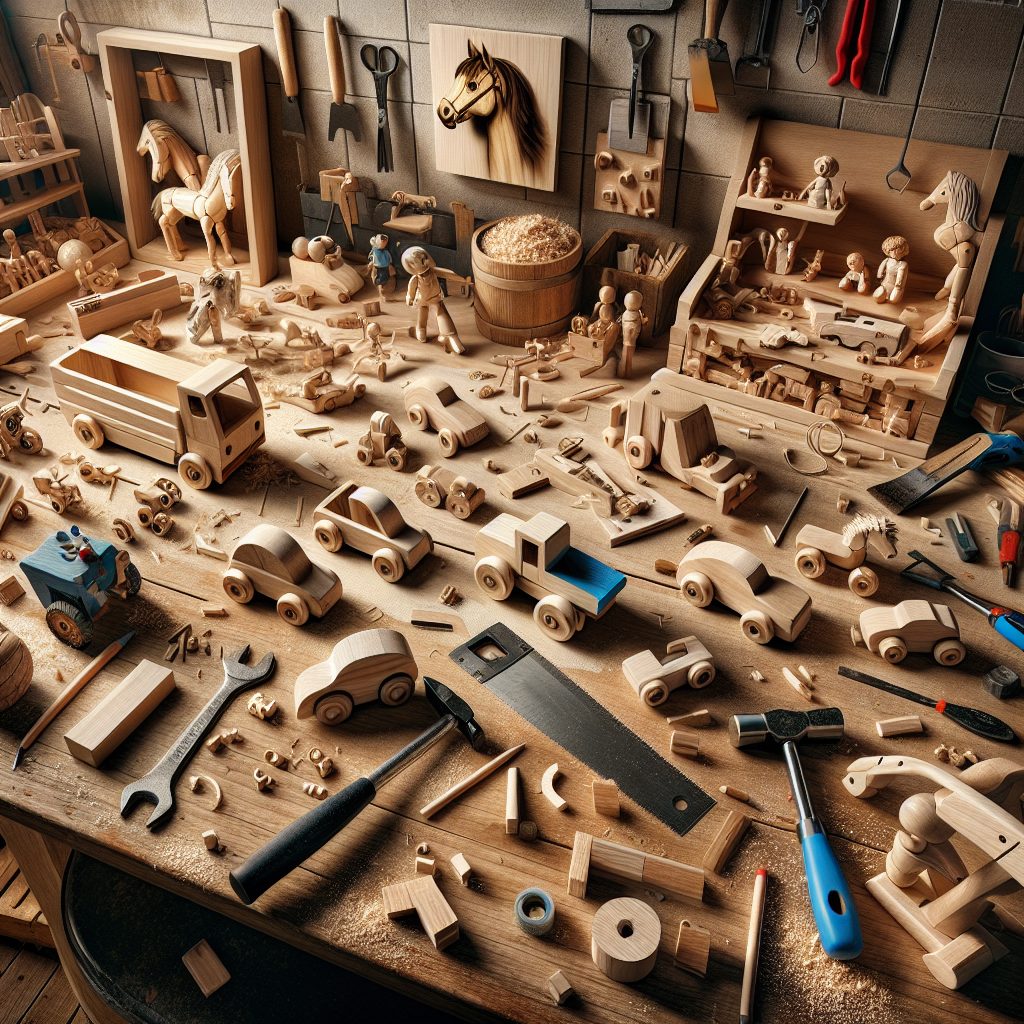
Gathering the Necessary Tools and Materials
Before diving into the assembly process, it’s crucial to gather all the necessary tools and materials. This will ensure a smooth and efficient DIY experience. Some essential tools you’ll likely need include:
- Wood glue
- Clamps
- Sandpaper
- Screwdrivers
- Hammer
- Drill
- Measuring tape
- Saw
- Pencil
Additionally, make sure you have all the wooden toy parts, such as pre-cut wooden pieces, wheels, axles, and any other components required for the specific toy you’re assembling.
Thoroughly Read and Understand the Instructions
Instructions are your roadmap when it comes to assembling wooden toys. Take the time to carefully read and understand them before starting the actual assembly process. Pay attention to any diagrams, symbols, or specific steps mentioned. This will help you avoid any mistakes or confusion along the way.
Prepare Your Work Area
Creating an organized and well-prepared work area is essential for efficient assembly. Ensure you have sufficient space to spread out all the parts and tools without clutter. If possible, use a flat surface, such as a workbench, to assemble the wooden toy. This will provide stability and make the process easier.
Follow a Step-by-Step Approach
To avoid confusion and keep track of your progress, it’s advisable to follow a step-by-step approach during the assembly process. Start with the first step as mentioned in the instructions and proceed accordingly. This methodical approach will help you assemble the toy correctly and without any missing steps.
Use Wood Glue and Clamps for Secure Joints
When connecting wooden parts, such as joints or pieces that need to be glued together, it’s crucial to use wood glue and clamps. Apply an appropriate amount of wood glue to the connecting surfaces and hold them tightly together using clamps. This will ensure a strong bond and prevent any loose parts.
Sand and Finish the Toy
Once the toy is fully assembled, it’s important to sand any rough edges or surfaces. Use sandpaper to smoothen the wooden toy, creating a safe and enjoyable play experience. Additionally, consider adding a protective finish, such as varnish or paint, to enhance the toy’s durability and appearance.
Ensure Safety Measures
When assembling wooden toys, safety should always be a top priority. Take necessary precautions, such as wearing protective goggles and gloves, to avoid any potential injuries. Keep small children away from your work area and store sharp tools securely to prevent accidents.
What are some additional tips for successful wooden toy assembly?
- Double-check all measurements and alignments to ensure accuracy.
- Take breaks if needed to maintain concentration and prevent fatigue.
- Consult online tutorials or forums for specific toy assembly techniques.
- Seek inspiration from completed wooden toy projects to enhance your creativity.
- Engage in proper storage and maintenance of your tools and materials for future projects.
Frequently Asked Questions
1. Can I use any type of wood for making wooden toys?
While you can technically use any type of wood for making wooden toys, it is recommended to use hardwoods like maple, oak, or birch for their durability and non-toxic properties.
2. Do I need any special tools for toy assembly?
Basic woodworking tools such as a saw, sandpaper, drill, and hammer would be sufficient for most wooden toy assembly projects. However, it would depend on the complexity of the toy design.
3. Should I apply any finish to the wooden toys?
Applying a non-toxic finish is highly recommended as it protects the toy from moisture and makes it safe for children to handle. You can use natural oils, such as beeswax or food-grade mineral oil, to finish the wooden toys.
4. How can I ensure the toys are safe for children?
When making wooden toys, it is crucial to avoid any small or detachable parts that could pose a choking hazard. Smooth all edges and surfaces to prevent splinters, and ensure that the toy does not have any sharp corners.
5. Can I paint the wooden toys?
Yes, you can paint wooden toys, but it is essential to use non-toxic, lead-free paint specifically made for children’s toys. Always follow the manufacturer’s instructions and allow the paint to dry completely before giving the toy to a child.
6. How can I make sure the toy parts fit together properly?
Accurate measurement and careful cutting of the wooden pieces are necessary to ensure proper fit. Using clamps or holding the pieces in place with masking tape during assembly can also help achieve a precise fit.
7. Are there any specific safety guidelines I should follow?
When working with woodworking tools, always wear safety goggles and gloves to protect yourself. Additionally, be cautious when handling sharp objects and use sturdy workbenches or clamps to secure your workpiece.
8. What is the best way to attach wooden parts together?
The most common methods for attaching wooden parts together in toy making are glue, screws, and dowels. The choice of method would depend on the design and intended use of the toy.
9. Can I sell the wooden toys I make?
Yes, you can sell the wooden toys you make, but it is advisable to research and comply with any safety standards or regulations specific to your region. Providing proper labeling with age recommendations and ensuring the toys meet safety requirements is crucial.
10. Where can I find toy assembly plans and ideas?
You can find various toy assembly plans and ideas online on woodworking websites, forums, or even on social media platforms. Additionally, you can also find books or magazines dedicated to wooden toy making that provide detailed plans and step-by-step instructions.
Final Thoughts on Wooden Toy Assembly Tips for DIY Makers
Wooden toy assembly can be a rewarding and fulfilling experience for DIY makers. Not only does it allow you to create unique and personalized toys for children, but it also promotes creativity and craftsmanship. By following the tips and guidelines provided, you can ensure that your wooden toys are safe, durable, and enjoyable for kids of all ages.
Remember to take your time, double-check measurements, and pay attention to detail during the assembly process. Always prioritize safety, whether it’s in choosing the wood, using appropriate finishes, or ensuring sturdy construction. With practice and patience, you can become skilled in wooden toy making and create cherished pieces that will be loved for generations.