Mastering finishing techniques for wooden toys is an important skill for any woodworking enthusiast or toy maker. The process of finishing involves applying a layer of protective coating or paint to the surface of the toy, not only enhancing its appearance but also protecting it from wear and tear. Interestingly, the type of finish used can greatly impact the final product, giving it unique features and qualities. For instance, a glossy finish can create a sleek and modern look, while a matte finish can give the toy a more rustic and natural feel.
Now that we understand the significance of mastering finishing techniques for wooden toys, let’s delve into the key takeaways that will be discussed in this article. Firstly, we will explore different types of finishes commonly used for wooden toys, including varnish, paint, and natural oil finishes, and highlight their specific benefits and drawbacks. Secondly, we will provide practical tips and step-by-step instructions on how to achieve a flawless finish, from preparing the surface to applying and curing the chosen finish. Finally, we will address common mistakes to avoid and troubleshoot any issues that may arise during the finishing process. By the end of this article, you will have gained valuable insights and knowledge to confidently create stunning wooden toys with professional-level finishing techniques.
Key Takeaways
1. Sanding is a crucial step in ensuring a smooth and professional finish for wooden toys. Start with a coarse grit sandpaper and gradually work your way up to finer grits to achieve the desired results.
2. Applying a sealer or primer before painting not only enhances the final look of the toy but also helps to protect the wood from moisture and other environmental damage. It is important to choose a non-toxic and child-safe product for this step.
3. Achieving vibrant and long-lasting colors on wooden toys can be achieved by using water-based paints specifically designed for wooden surfaces. These paints are safe for children and offer a wide range of colors to choose from.
4. To create a natural-looking finish on wooden toys, using a wood stain is the way to go. Whether you prefer a light or dark stain, it is important to apply the stain evenly and wipe off any excess to avoid uneven coloring.
5. The final step in finishing wooden toys is applying a protective topcoat. A clear and hard-wearing varnish or lacquer can help protect the toy from wear and tear, as well as provide a polished and professional look. Be sure to follow the manufacturer’s instructions for proper application and drying times.
What are the Key Tips for Mastering Finishing Techniques for Wooden Toys?
The Importance of Finishing Techniques
When it comes to wooden toys, mastering finishing techniques is crucial not only for enhancing their visual appeal but also for ensuring longevity. Applying the right finish can protect the wood from moisture, prevent it from splintering, and improve its overall durability. Moreover, a well-finished wooden toy feels smooth and pleasant to touch, making it more enjoyable for children to play with. In this article, we will explore various aspects of finishing techniques for wooden toys and provide you with valuable tips to become a master in this craft.
Choosing the Right Finish
Choosing the appropriate finish is the first step towards mastering finishing techniques for wooden toys. There are several options available, such as oil-based finishes, water-based finishes, and shellac. Each type has its own advantages and considerations. Oil-based finishes, for example, provide a durable and strong coating, while water-based finishes offer quick drying and low toxicity. Shellac, on the other hand, provides a traditional and natural look. Consider the characteristics of the toy, its purpose, and the desired aesthetic when selecting the ideal finish.
Preparing the Surface
Before applying any finish, it is vital to properly prepare the wooden surface. This involves sanding the toy to achieve a smooth and even texture. Start with a rough-grit sandpaper to remove any imperfections, such as splinters or rough edges. Gradually move to finer-grit sandpaper to achieve a polished and refined surface. Additionally, ensure that the wood is clean and free from dust or debris by wiping it with a damp cloth. Adequate surface preparation lays the foundation for a flawless finish.
Applying the Finish
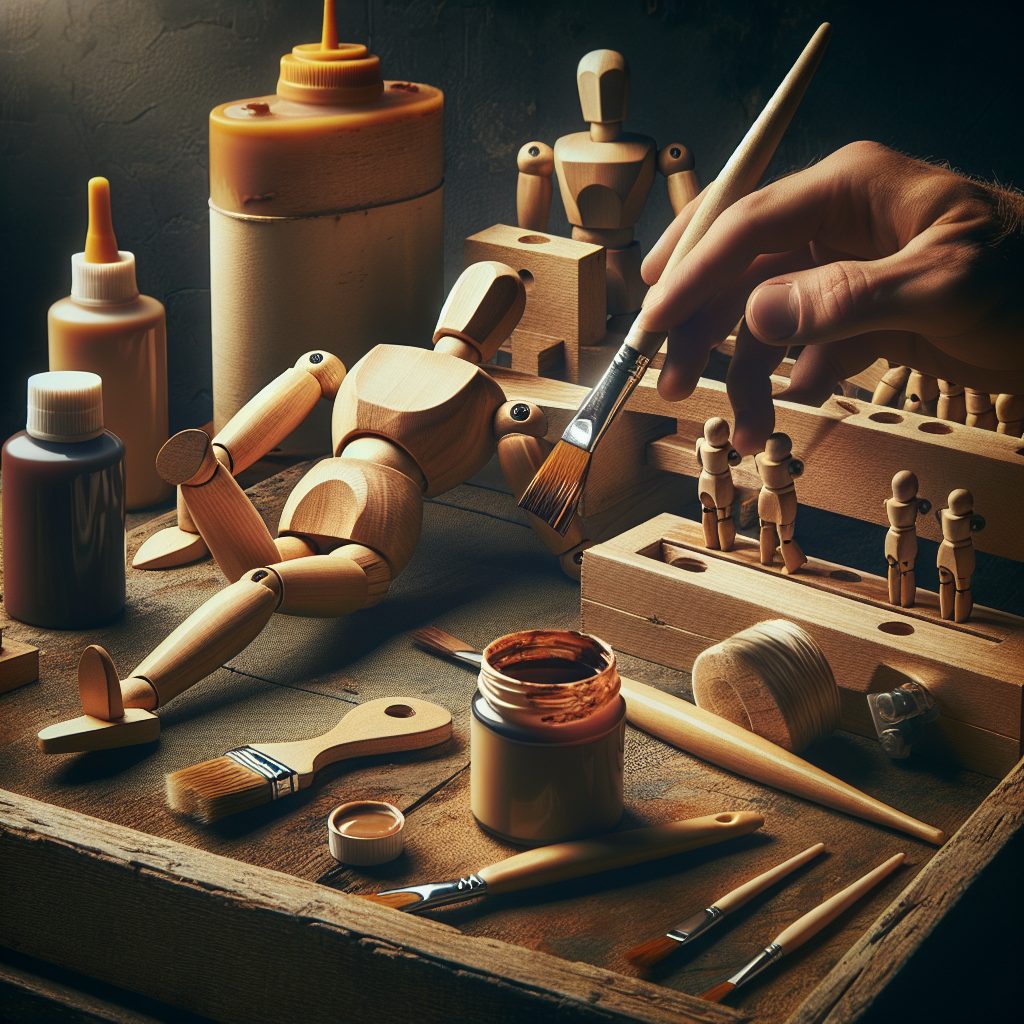
The application of the selected finish can significantly impact the final outcome. Whether you choose to use a brush, cloth, or spray, it is essential to follow the manufacturer’s instructions carefully. Apply thin and even coats, allowing each layer to dry completely before applying the next. This process may require multiple coats to achieve the desired depth and protection. Take your time and exercise patience to ensure a professional-looking finish.
Sealing and Protecting
Once the desired finish is applied, it is crucial to seal and protect the wooden toy. Sealing prevents moisture from penetrating the wood, reducing the risk of swelling or warping. Consider using a sealant or topcoat specifically designed for wooden toys. This additional layer acts as a barrier against wear and tear, ensuring the longevity of the toy. Moreover, it provides a glossy or satin finish, further enhancing its visual appeal.
Regular Maintenance and Care
Maintaining the finish on wooden toys is essential to preserve their beauty and durability over time. Regularly clean the toy using mild soap and water, then dry it thoroughly. Avoid using harsh chemicals or abrasive cleaners that may damage the finish. Additionally, inspect the toy for any signs of wear or damage and address them promptly with touch-up applications or re-finishing. By consistently caring for your wooden toys, you can extend their lifespan and keep them in pristine condition.
1. How do I choose the most suitable finish for my wooden toy?
Consider the characteristics of your wooden toy, its purpose, and the desired aesthetic when selecting a finish. Assess the advantages and considerations of oil-based finishes, water-based finishes, and shellac to make an informed decision.
2. What steps should I follow to prepare the wooden surface for finishing?
Properly prepare the surface by sanding the toy with progressively finer-grit sandpaper. Start with a rough-grit sandpaper to remove imperfections, then move to finer-grit sandpaper for a polished surface. Ensure the wood is clean and free from dust or debris by wiping it with a damp cloth.
3. How should I apply the finish to achieve the best results?
Follow the manufacturer’s instructions carefully, whether you use a brush, cloth, or spray. Apply thin and even coats, allowing each layer to dry completely before applying the next. Take your time and exercise patience to achieve a professional-looking finish.
4. Why is sealing and protecting the wooden toy important?
Sealing prevents moisture from penetrating the wood and reduces the risk of swelling or warping. It also acts as a barrier against wear and tear, enhancing the durability and visual appeal of the toy.
5. How can I maintain the finish of my wooden toy?
Regularly clean the toy using mild soap and water, avoiding harsh chemicals or abrasive cleaners. Inspect for wear or damage and address them promptly with touch-up applications or re-finishing. Consistent care will help extend the lifespan of your wooden toy.
Frequently Asked Questions
1. What are finishing techniques for wooden toys?
Finishing techniques for wooden toys refer to the process of applying protective coatings or treatments to enhance the appearance and durability of the toys. These techniques may include sanding, staining, painting, varnishing, or using natural oils and waxes.
2. Why is it important to master finishing techniques for wooden toys?
Mastering finishing techniques is crucial to ensure that wooden toys withstand the test of time and daily play. Proper finishing not only adds aesthetic appeal but also provides protection against moisture, wear and tear, and protects children from potential hazards, such as splinters.
3. Which finishing technique is best for wooden toys?
The choice of finishing technique depends on personal preference and the intended use of the toys. Generally, non-toxic finishes such as water-based paints, natural oils, or food-grade waxes are recommended for children’s toys to ensure safety.
4. How can I prepare wooden toys for finishing?
Before applying any finishing technique, it is essential to prepare the wooden surface. This involves sanding the toys to smoothen rough edges and remove any imperfections. A clean and dust-free surface ensures better adherence of the chosen finish.
5. Are there any eco-friendly finishing options available?
Yes, there are several eco-friendly finishing options for wooden toys. Natural oils like beeswax and linseed oil are popular choices as they are non-toxic and provide a smooth, natural finish. Water-based paints and varnishes labeled as eco-friendly or low-VOC (volatile organic compounds) are also environmentally conscious options.
6. Can I use regular household paints for finishing wooden toys?
Regular household paints may contain harmful chemicals or VOCs that can be toxic when applied to children’s toys. It is advisable to opt for paints specifically formulated for toys, such as water-based, non-toxic paints that comply with safety standards.
7. How many coats of finish should I apply?
The number of coats generally depends on the type of finish and desired outcome. However, it is recommended to apply at least two coats for adequate protection and better durability. Ensure each coat is allowed to dry completely before applying the next.
8. Can I use a spray finish for wooden toys?
Spray finishing can be an efficient method for applying finishes to wooden toys. However, it is important to use a spray finish specifically designed for toys and follow the manufacturer’s instructions. Ensure proper ventilation and adequate protection to avoid inhaling the spray or getting it on your skin.
9. How can I maintain the finish on wooden toys?
To maintain the finish on wooden toys, avoid exposing them to excessive moisture or direct sunlight for prolonged periods. Regularly wipe the toys with a soft cloth to remove dust and prevent buildup. If needed, apply a fresh coat of finish to restore the appearance and protection.
10. Can I customize the finishes for wooden toys?
Absolutely! Finishing techniques allow for customization and personalization of wooden toys. Experiment with different colors, effects, or patterns to create unique and attractive finishes that match your preferences or complement the toy’s design.
Final Thoughts
Mastering finishing techniques for wooden toys not only ensures their longevity but also enhances their beauty and safety for children. By understanding the various finishing options available, preparing the wood properly, and using non-toxic and eco-friendly finishes, you can create stunning toys that are safe to play with and durable enough to be cherished for generations.
Remember, the process of finishing wooden toys requires patience, attention to detail, and adherence to safety guidelines. It is a rewarding skill that allows you to create truly remarkable toys that can be passed down as cherished heirlooms. So embrace the art of mastering finishing techniques and discover the joy of creating wooden toys that capture the imagination and bring happiness to children.