Finishing Techniques for Homemade Wooden Puzzles offer an array of possibilities to enhance the overall appearance and quality of these delightful brain-teasers. With a wide variety of approaches available, puzzle enthusiasts can indulge in the art of finishing, showcasing their creativity and attention to detail. One unique aspect of finishing techniques is their ability to not only improve the aesthetics but also contribute to the durability and longevity of the wooden puzzles. With the right finishes, these homemade treasures can be transformed into heirloom pieces that can be cherished for generations to come.
One key impact of utilizing effective finishing techniques is the enhancement of the puzzle’s visual appeal. The choice of materials, such as varnishes, waxes, or oils, can enrich the natural color and grain of the wood, adding depth and character to the final product. In addition, finishes can help protect the wood from moisture, providing a shield against potential damage over time. This is particularly important for homemade wooden puzzles, as they are more susceptible to wear and tear, making a durable finish essential for their longevity.
Moving forward, this article will delve into the key takeaways of finishing techniques for homemade wooden puzzles. We will explore various types of finishes, their specific applications, and the step-by-step process to achieve professional-looking results. Whether you are a puzzle enthusiast or a woodworking hobbyist, these insights will equip you with the knowledge to elevate your puzzle-making skills and create captivating and enduring wooden puzzles. Stay tuned to discover the secrets behind remarkable finishes that will truly make your homemade puzzles stand out.
Key Takeaways
1. Sanding and sealing are essential finishing techniques for wooden puzzles, ensuring a smooth surface and protecting the wood from damage.
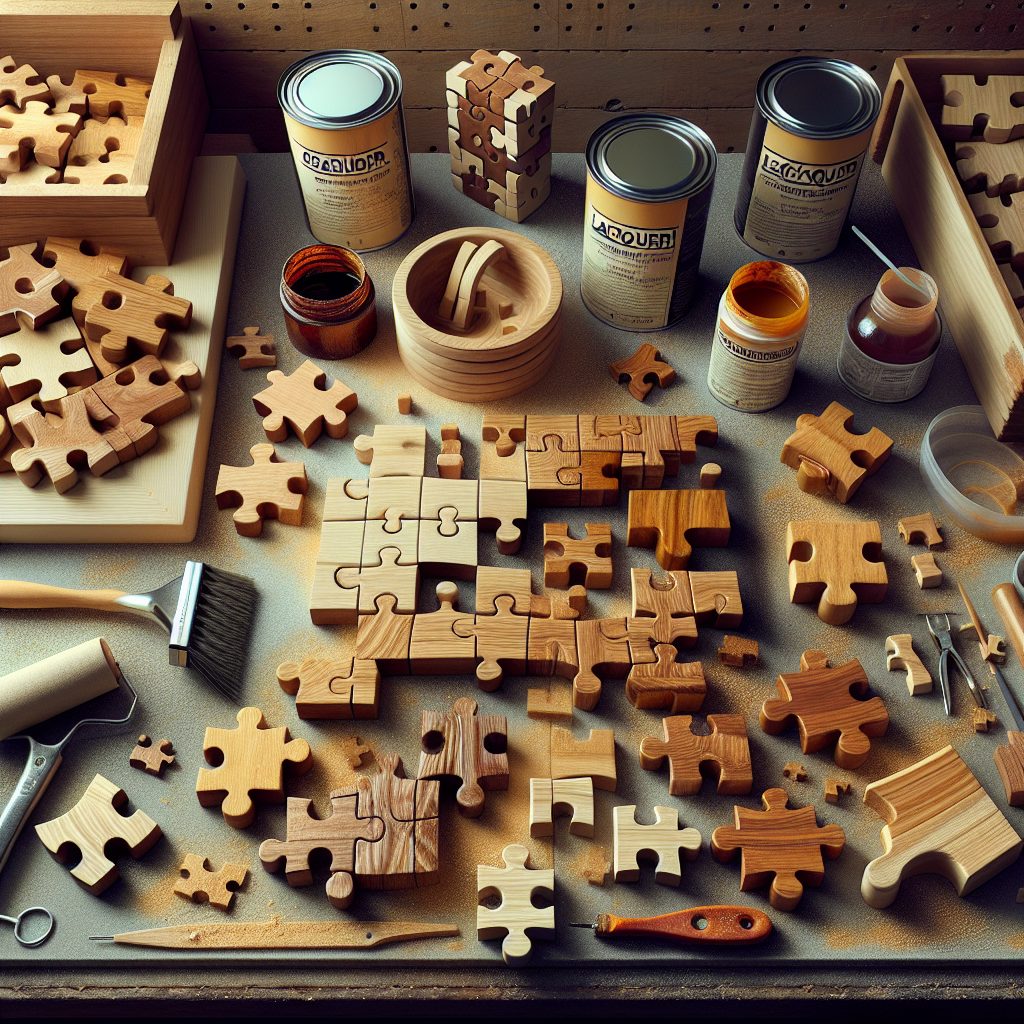
2. Applying a layer of lacquer or varnish not only enhances the aesthetic appeal of wooden puzzles but also provides long-lasting protection against wear and tear.
3. Utilizing different staining techniques, such as oil-based stains or water-based dyes, can give wooden puzzles a personalized and vibrant appearance.
4. Adding a layer of wax or polish after the final coat of finish can provide extra shine and help preserve the wood’s natural beauty.
5. Properly documenting and labeling wooden puzzle pieces during the finishing process is crucial to avoid confusion and ensure a seamless assembly experience for the puzzle enthusiasts.
What are the Best SEO-Optimized Finishing Techniques for Homemade Wooden Puzzles?
Choosing the Right Finishing Products
When it comes to finishing homemade wooden puzzles, selecting the appropriate products for the job is crucial. Opt for non-toxic finishes that are safe for children to handle and ensure they won’t damage the wood over time. Popular choices include food-safe mineral oil, natural beeswax, and eco-friendly clear varnishes.
Preparing the Wood Surface
Before applying any finish, it’s important to properly prepare the wooden puzzle pieces. Begin by sanding the surfaces to a smooth finish, starting with a coarser grit sandpaper and gradually moving to a finer grit. This step helps to remove any imperfections and creates a surface that will absorb the finish evenly.
Applying the Finish
There are several techniques you can use to apply the finish to your homemade wooden puzzle. One popular method is to brush on the finish using a foam brush or soft-bristle brush. Make sure to apply even coats and follow the manufacturer’s instructions for drying times. Alternatively, you can immerse the puzzle pieces in a finish bath, allowing them to soak and absorb the finish thoroughly.
Enhancing the Puzzle with Stains or Dyes
If you want to add additional depth and character to your wooden puzzle, consider using stains or dyes. These products can help bring out the natural grain patterns and create a more visually appealing puzzle. Apply the stain or dye evenly using a brush or cloth, and experiment with different colors to achieve your desired effect.
Sealing the Finish
After applying the chosen finish and allowing it to dry completely, it’s necessary to seal the surface to protect the wood and the puzzle’s integrity. Use a clear sealant, such as a polyurethane varnish, to provide a durable and long-lasting protective layer. Apply multiple coats, sanding lightly between each layer, to ensure thorough coverage.
Numbered Guides for Perfect Finishing Techniques
- Always work in a well-ventilated area to avoid inhaling harmful fumes.
- Test the finish on a small, inconspicuous area of the puzzle to ensure compatibility and achieve the desired result.
- Sand the puzzle pieces between coats of finish to eliminate any imperfections and create a smooth surface.
- Consider using wax or polish to give the puzzle a final gleaming touch.
- Allow the puzzle to fully cure before handling or packaging to prevent smudging or sticking.
Frequently Asked Questions
1. What types of finishing techniques can be used for homemade wooden puzzles?
There are various finishing techniques that can be used for homemade wooden puzzles. Some popular options include staining, varnishing, painting, and applying a clear coat. The choice of technique depends on the desired outcome and personal preference.
2. How can staining enhance the appearance of a wooden puzzle?
Staining can enhance the appearance of a wooden puzzle by adding depth and highlighting the natural beauty of the wood grain. It can also help to protect the puzzle from moisture and general wear and tear.
3. Can acrylic paints be used to color wooden puzzles?
Absolutely! Acrylic paints are a versatile option for coloring wooden puzzles. They offer a wide range of colors and can be easily mixed to create custom shades. Additionally, acrylic paints dry quickly and provide a durable finish.
4. What is the purpose of applying a clear coat to a wooden puzzle?
Applying a clear coat to a wooden puzzle serves multiple purposes. It protects the wood from moisture, scratches, and fading. Additionally, it adds a glossy or satin finish depending on the desired look.
5. How long does it take for the finishing products to dry on a wooden puzzle?
The drying time of finishing products varies depending on the specific product used and environmental factors such as temperature and humidity. Generally, it can take anywhere from a few hours to a couple of days for the finish to fully dry.
6. Can unfinished wood puzzles be painted directly?
Unfinished wood puzzles can be painted directly, but it is recommended to prepare the surface first. Light sanding and applying a primer can help the paint adhere better and result in a smoother finish.
7. Are there any eco-friendly finishing options for wooden puzzles?
Yes, there are eco-friendly finishing options available for wooden puzzles. Natural oils and waxes, such as linseed oil or beeswax, are environmentally friendly choices that can protect and enhance the wooden surface without harmful chemicals.
8. How can I prevent the puzzle pieces from sticking together after applying a finish?
To prevent the puzzle pieces from sticking together, it is important to ensure that the finish is completely dry before assembling the puzzle. Additionally, using a non-stick puzzle mat or wax paper between the pieces while drying can further prevent sticking.
9. Can I use sandpaper to create a distressed finish on a wooden puzzle?
Yes, sandpaper can be used to create a distressed finish on a wooden puzzle. It can be applied selectively to certain areas to create a weathered or antique look. Experimenting with different grits of sandpaper can achieve various levels of distressing.
10. How should I clean and maintain a finished wooden puzzle?
To clean a finished wooden puzzle, simply use a dry or slightly damp cloth to remove any dust or dirt. Avoid using harsh chemicals or excessive water as they can damage the finish. Regularly inspect the puzzle for any signs of wear and consider reapplying a new coat of finish if necessary.
Final Thoughts
Finishing techniques play a crucial role in transforming homemade wooden puzzles into beautiful and durable pieces of art. The choice of finish can greatly impact the overall appearance and longevity of the puzzle. Whether you opt for staining, painting, or sealing, it’s important to carefully consider the desired outcome and follow the proper application techniques.
Experimenting with different finishing techniques can be an enjoyable and creative process. Taking the time to properly finish a handmade wooden puzzle not only enhances its aesthetic appeal but also ensures its longevity, allowing it to be treasured and enjoyed for generations to come.