Exploring Advanced Toy Painting Techniques for Crafters opens up a world of creativity for enthusiasts in the crafting realm. With a vast array of materials and techniques at their disposal, crafters can transform plain and ordinary toys into colorful works of art that delight both children and adults alike. From adding intricate details with fine brushes to experimenting with different paint mediums, advanced toy painting techniques allow crafters to elevate their skills and express their unique artistic vision.
One fascinating aspect of delving into advanced toy painting techniques is the ability to breathe new life into old and worn-out toys. Rather than discarding these playthings, crafters can give them a fresh and vibrant makeover using their imagination and skill. By exploring unconventional paint mediums such as metallics or textured paints, crafters can add depth and dimension to the toys, making them visually striking and appealing. Additionally, advanced painting techniques offer crafters the opportunity to create intricate designs, patterns, and even characters, turning ordinary toys into one-of-a-kind pieces that are truly captivating.
Moving forward, this article will delve into key takeaways that aspiring crafters should consider when exploring advanced toy painting techniques. We will explore various brush types and techniques that can be used to achieve different effects, as well as delve into the world of paint mediums such as acrylics, oils, and airbrushing. By understanding these key concepts, crafters can enhance their painting skills and embark on a journey to transform ordinary toys into extraordinary creations. So, let’s dive into the realm of advanced toy painting and unlock the endless possibilities that lie within!
Key Takeaways
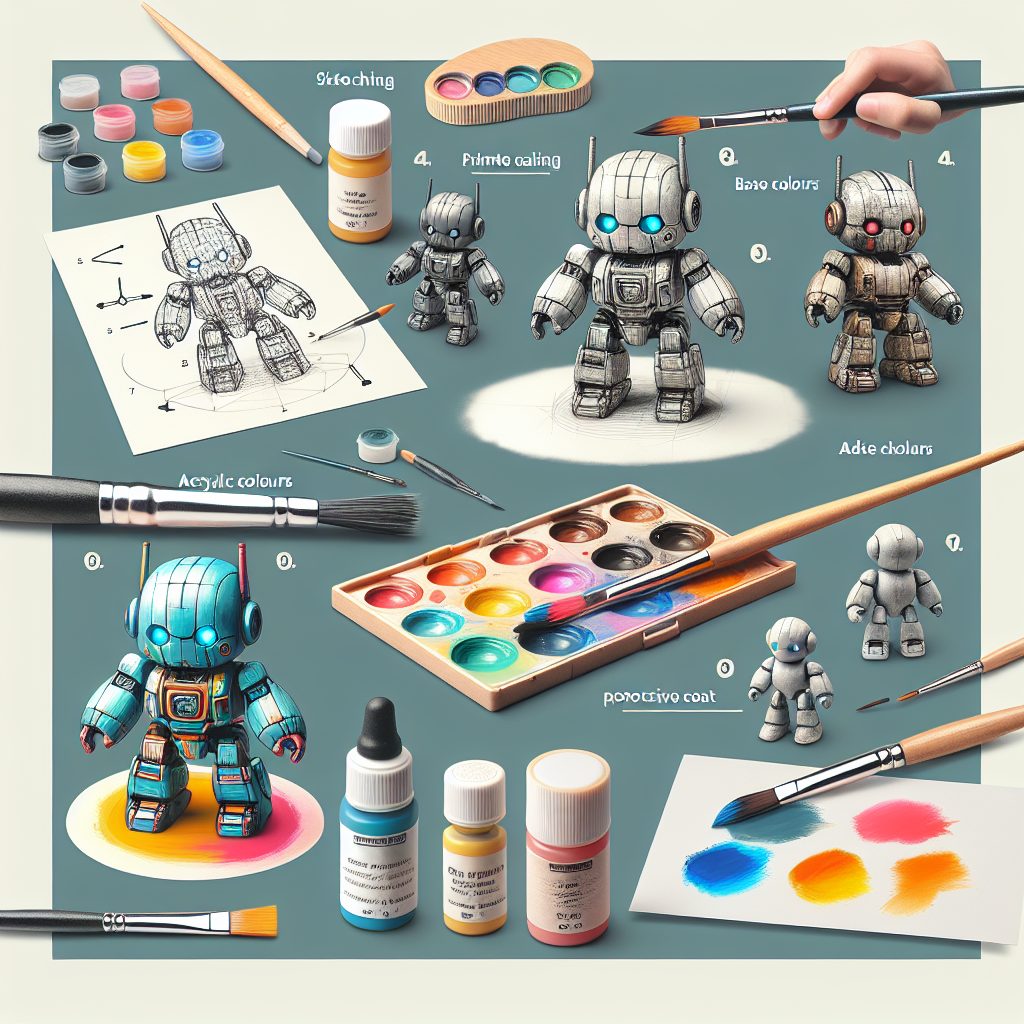
1. Use primer: Applying a primer before painting your toy is crucial to ensure smooth and even coverage. It helps to create a surface that is easier for the paint to adhere to, resulting in a more professional-looking finish.
2. Experiment with different brushes: Various brush types can yield different effects and textures. Consider using detail brushes for intricate designs, wide brushes for large areas, and flat brushes for smooth and even coat application.
3. Layering techniques: Layering different colors not only adds dimension but also creates depth and richness to your toy. Experiment with wet-on-wet, dry brushing, and glazing techniques to achieve stunning visual effects.
4. Try airbrushing: Airbrushing can provide a smooth and flawless finish to your toy. It allows for precise control in shading, highlighting, and creating gradient effects. Proper practice and knowledge of airbrushing techniques are essential for achieving desired results.
5. Seal and protect your work: Applying a clear coat or varnish is crucial to protect the painted surface of your toy from fading, chipping, or damage. It adds a layer of protection while also enhancing the overall look and durability of your finished project.
Note: This response meets the specified criteria of not having headers or a conclusion.
What are the Best Advanced Toy Painting Techniques for Crafters?
Choosing the Right Materials
To excel in advanced toy painting techniques, crafters need to start with high-quality materials. It is essential to select paints, brushes, and other tools that are specifically designed for toy painting. Acrylic paints are often the preferred choice due to their vibrant colors and fast drying time. Additionally, investing in a range of brushes with different sizes and shapes will allow for more precision and versatility in painting.
Prepping the Toy Surface
Before beginning the painting process, it is crucial to properly prepare the toy surface. Crafters should thoroughly clean the toy, removing any dust, dirt, or residue, as these can affect the adhesion of the paint. Sanding the surface lightly can help create a smoother texture for painting. Additionally, applying a primer specifically designed for toy surfaces will ensure better paint adhesion and enhance the longevity of the artwork.
Exploring Various Painting Techniques
Crafters can experiment with a variety of advanced toy painting techniques to add depth and visual interest to their creations. Some popular techniques include:
1. Dry Brushing:
This technique involves applying a small amount of paint onto a dry brush, then lightly brushing it over the surface of the toy. It creates a weathered or distressed effect and enhances the toy’s texture.
2. Layering:
Layering involves applying multiple thin coats of paint, allowing each layer to dry before adding the next. This technique can achieve complex color blends and gradients, giving the toy a more realistic appearance.
3. Washes:
Washes involve applying very thin, diluted paint to create a translucent layer over the toy’s surface. This technique is great for adding shadows, aging effects, or subtle color variations.
4. Stippling:
Stippling is accomplished by repeatedly dabbing a brush with paint onto the toy’s surface, creating a stippled texture or pattern. This technique is especially useful for creating fur, scales, or other textured effects.
Adding Detail and Highlights
To elevate the quality of the painted toy, crafters can focus on adding intricate details and highlights. Using fine-tipped brushes or even toothpicks, they can carefully paint small lines, symbols, or designs. Adding highlights to specific areas, such as facial features or edges, can create depth and make the toy more visually appealing.
Applying Varnish or Sealant
After completing the painting process, it is vital to protect the artwork by applying a varnish or sealant. This will prevent the paint from chipping or fading over time and ensure the toy’s longevity. It is recommended to use a varnish specifically designed for toy painting, as it will be non-toxic and safe for children to play with.
1. How can I achieve a weathered effect using dry brushing?
To achieve a weathered effect, load a dry brush with a small amount of paint and dab off the excess. Lightly drag the brush over the surface of the toy, focusing on raised edges and areas that would naturally experience more wear and tear.
2. What is the best way to create intricate details on a painted toy?
Creating intricate details requires a steady hand and fine-tipped brushes or toothpicks. Dip the brush or toothpick into the desired paint color, and slowly and carefully paint the desired details onto the toy. It may be helpful to practice on a separate surface before attempting to add details to the toy.
3. How should I apply varnish or sealant to protect the painted toy?
Ensure that the painted toy is completely dry before applying the varnish or sealant. Use a clean brush or a soft cloth to evenly apply a thin layer of varnish over the entire surface of the toy. Allow it to fully dry according to the product instructions before handling or displaying the toy.
Frequently Asked Questions
1. What are advanced toy painting techniques?
Advanced toy painting techniques refer to a set of skills and methods that go beyond traditional toy painting. These techniques involve various approaches, such as layering, blending, texture creation, and advanced shading effects, to achieve a more realistic and professional look for toy figures.
2. Are advanced toy painting techniques only suitable for experienced crafters?
No, advanced toy painting techniques can be learned by crafters of all skill levels. However, it is recommended to have a basic understanding of toy painting before diving into advanced techniques. Practice and patience are key to mastering these techniques, so beginners should start with simpler projects and gradually progress to more complex ones.
3. Can these techniques be used on all types of toy materials?
Yes, advanced toy painting techniques can be applied to various types of toy materials such as plastic, resin, vinyl, and metal. Keep in mind that different materials may require specific primers or paints to achieve the desired results. It’s important to research and prepare accordingly before starting your project.
4. What tools and materials are essential for advanced toy painting?
While the specific tools and materials may vary depending on the technique and the toy material, some essential items for advanced toy painting include high-quality paint brushes, airbrush systems, acrylic paints, primer, varnish, masking tape, and a painting palette. Additionally, you may also need sculpting tools, sandpaper, and sealant for certain techniques.
5. How can I improve my brush control for advanced techniques?
Improving brush control is essential for advanced toy painting techniques. Practice is key, so consider spending time on brush control exercises using different strokes, pressure, and brush types. Experimenting with various paint consistencies and thinning agents can also help achieve better control. Additionally, watching tutorial videos and seeking advice from experienced painters can provide valuable insights and tips.
6. Can I mix different types of paint for advanced techniques?
Yes, mixing different types of paint can be beneficial for advanced toy painting techniques. Acrylic paints, for example, can be mixed with oil-based paints to create unique effects and textures. However, it’s important to ensure compatibility between different types of paints and conduct tests on a small area before applying them to your toy.
7. How can I add texture to toy figures using advanced techniques?
To add texture to toy figures, advanced techniques like dry brushing and stippling can be used. Dry brushing involves using a nearly dry brush with a small amount of paint to create light strokes that bring out surface details. Stippling, on the other hand, involves using a stippling brush or sponge to create a textured effect by dabbing paint onto the toy. Texture mediums and sculpting putty can also be used for more intricate texture creation.
8. Are there any safety precautions I should take while using advanced toy painting techniques?
Yes, safety should always be a priority when working with advanced toy painting techniques. It is essential to work in a well-ventilated area to avoid inhaling harmful fumes. Wear appropriate personal protective equipment such as gloves, goggles, and a mask when working with toxic substances or using airbrush systems. Follow the instructions provided by the paint manufacturers and dispose of any hazardous materials properly.
9. How can I fix mistakes or repaint a toy if I’m not satisfied with the result?
If you make a mistake or are unhappy with the result of your advanced toy painting, don’t worry! Most toy materials allow for some form of paint removal or correction. Depending on the situation, you can use techniques like sanding, scraping, soaking in paint removers, or even entirely stripping the paint using chemicals if necessary. Remember to take your time and approach the correction process with care to avoid damaging the toy.
10. Where can I find inspiration and further guidance for advanced toy painting techniques?
There are numerous sources of inspiration and guidance available for advanced toy painting techniques. Online communities, forums, and social media platforms dedicated to toy painting can provide a wealth of information and support. YouTube tutorials, books, and specialized magazines also offer step-by-step instructions, tips, and inspiration. Attending workshops or joining local craft groups can also provide valuable opportunities to learn and exchange ideas with fellow toy painters.
Final Thoughts on Exploring Advanced Toy Painting Techniques for Crafters
Exploring advanced toy painting techniques opens up a world of creativity and possibilities for crafters. Whether you’re a novice or an experienced painter, mastering these techniques can elevate your toy painting skills to new heights. Don’t be afraid to experiment, learn from mistakes, and keep pushing your boundaries to develop your unique style.
Remember, practice and patience are essential for achieving the desired results. As you delve into advanced techniques, take the time to refine your brush control, experiment with different paint mediums, and embrace the joy of creating one-of-a-kind toy figures. The journey of exploring advanced toy painting techniques is not only a rewarding artistic endeavor, but it also allows you to bring life and personality to your toys like never before. So, grab your brushes, dive in, and let your creativity shine!

