Decorating Your DIY Wooden Toys: Creative Ideas
When it comes to creating your own wooden toys, the possibilities for creativity and customization are endless. DIY wooden toys have become increasingly popular for their versatility and the joy they bring to both children and adults alike. From classic designs to whimsical creatures, wooden toys offer a timeless appeal that can be enhanced through creative decoration.
One unique aspect of decorating DIY wooden toys is the ability to personalize them according to your own preferences and imagination. Whether you choose to paint them in vibrant colors or leave them with a natural finish, the process of decorating wooden toys allows you to add a personal touch that makes each toy truly one-of-a-kind. By embellishing them with patterns, stickers, or even gluing on decorative elements, you can transform a plain wooden toy into a visually appealing and visually stimulating plaything.
Moving forward, this article will explore key takeaways for decorating your DIY wooden toys. We will discuss the various materials and techniques that can be used to add color and flair to your creations. Additionally, we will delve into the benefits of involving children in the decoration process, fostering their creativity while bonding over a shared activity. Stay tuned to discover how you can take your DIY wooden toys to the next level and create unique, personalized playthings that will be cherished for years to come.
Key Takeaways
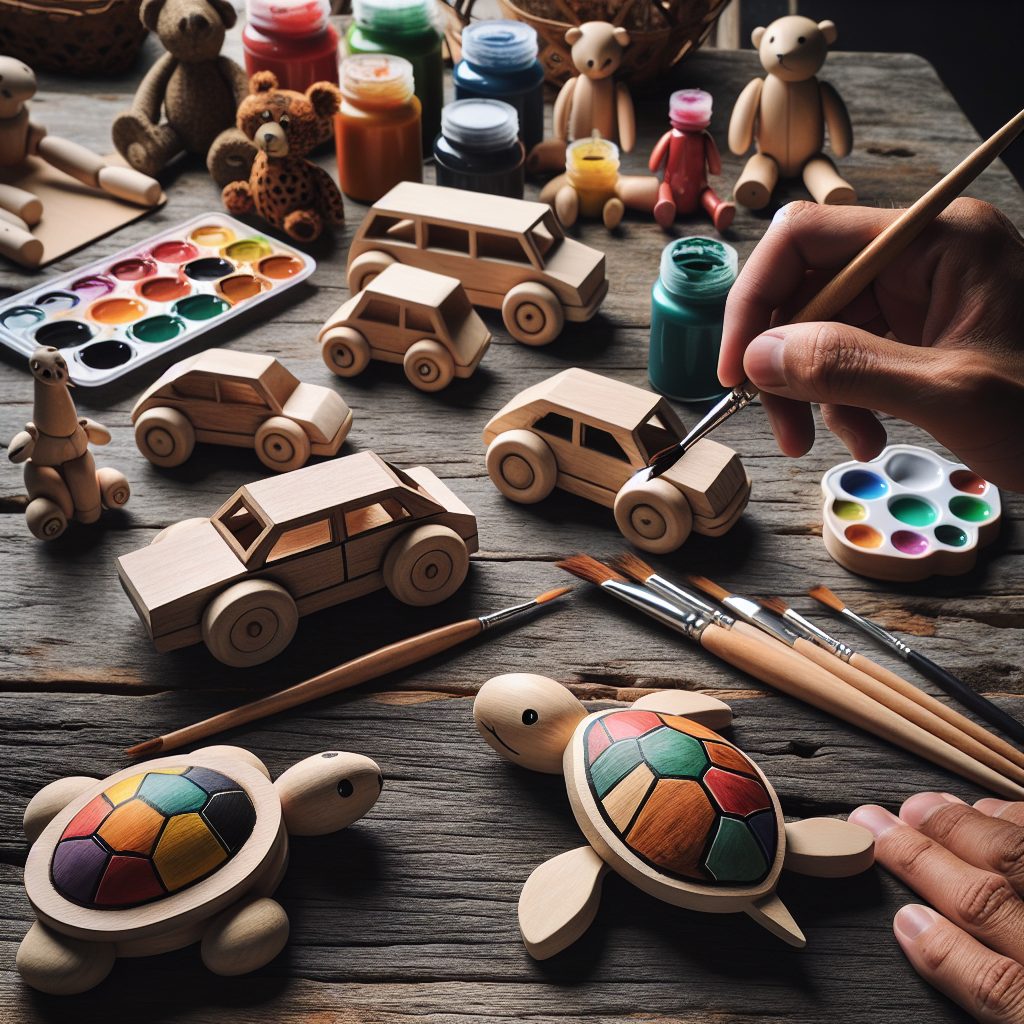
1. Painting is a popular and effective way to add color and personalization to DIY wooden toys. Use non-toxic, water-based paints and consider different techniques such as stenciling, stamping, or freehand designs.
2. Applying a protective finish to wooden toys is crucial to enhance durability and prevent damage. Opt for child-safe finishes like beeswax or food-grade mineral oil, and apply multiple coats for a smooth and long-lasting result.
3. Decoupage is a versatile and creative technique that allows you to decorate wooden toys with decorative paper or fabric. Experiment with different patterns, textures, and themes to make your toys truly unique.
4. Woodburning or pyrography is a fantastic way to create intricate designs and patterns on wooden toys. Invest in a high-quality woodburning pen and practice on scrap wood before attempting it on your DIY toys.
5. Adding small embellishments like buttons, beads, or ribbons can instantly elevate the look of your wooden toys. Ensure these embellishments are securely attached and age-appropriate for safe play.
Remember, decorating your DIY wooden toys is a chance to let your creativity shine and make them truly one-of-a-kind.
What are some creative ideas for decorating your DIY wooden toys?
Painting and Staining
One of the most popular and versatile ways to decorate your DIY wooden toys is by painting or staining them. You can use acrylic paints, watercolors, or even spray paint to add vibrant colors to your toys. Staining, on the other hand, enhances the natural beauty of the wood while providing a protective finish. Experiment with different techniques like brush strokes, sponge painting, or creating patterns to make your toys truly unique.
Decoupage
Decoupage is a technique that involves decorating surfaces with cut-out paper or fabric designs. It’s an excellent way to add texture and visual interest to your wooden toys. Start by choosing your desired theme or pattern, then carefully glue the cut-outs onto the toy using a decoupage medium. Finally, apply several coats of varnish or sealant to ensure durability. You can create decoupage designs inspired by nature, animals, or even your child’s favorite storybook characters.
Wood Burning
For a more rustic and artistic touch, consider wood burning or pyrography. This technique involves using a heated tool to create intricate designs, patterns, or even personalized messages on the wooden surface. You can purchase wood burning kits that come with different tips for various effects. Take your time to plan your design, and practice on scrap wood before working on your actual toys. Wood burning adds a unique and timeless charm to any DIY wooden toy.
Embellishments
Add an extra touch of creativity by incorporating embellishments into your DIY wooden toys. You can attach buttons, beads, ribbons, or even small pieces of fabric to enhance the toy’s appearance. Use non-toxic glue or stitching to secure these embellishments, ensuring they won’t pose any choking hazards for young children. Be mindful of the toy’s functionality and make sure the embellishments are securely attached.
Using Washi Tape
Washi tape is a decorative adhesive tape made from natural fibers. It comes in a wide variety of colors, patterns, and widths, making it perfect for adding quick and easy decorations to your DIY wooden toys. Simply cut the tape to the desired length and stick it onto the toy’s surface. You can create geometric patterns, stripes, or even cover the entire toy with colorful tape for a playful look. The best part is that washi tape is removable, allowing you to change the designs whenever you want.
Numbered Guides or Tips:
- Ensure the wooden toys are properly sanded and smooth before decorating to achieve the best results.
- Experiment with different techniques and materials to find your own unique style.
- Consider the age and safety of the children playing with the toys when choosing decorations. Avoid using small or sharp objects that could pose a hazard.
- Seal your decorated wooden toys with a child-safe varnish or sealant to protect the decorations and extend the lifespan of the toys.
- Encourage children to participate in the decoration process to foster their creativity and sense of ownership.
Frequently Asked Questions
1. Can I paint wooden toys for my child?
Yes, you can definitely paint wooden toys! Using non-toxic paint and sealants, you can transform plain wooden toys into vibrant pieces that your child will love.
2. What type of paint should I use for wooden toys?
It’s important to choose non-toxic, child-safe paint for wooden toys. Look for acrylic paints that are labeled as safe for toys and free from harmful chemicals.
3. How do I prepare the wooden toy surface before painting?
Before painting, you should sand the wooden toy surface to ensure a smooth finish. Use fine-grit sandpaper to gently remove any roughness or imperfections.
4. Can I use stencils or templates to decorate my wooden toys?
Absolutely! Stencils or templates are a great way to add intricate designs or patterns to your wooden toys. Just make sure to secure them tightly and use a small brush for precise painting.
5. Should I use a primer before painting?
Using a primer is not necessary for wooden toys unless you’re working with a particularly porous or uneven surface. However, it can help the paint adhere better and create a more durable finish.
6. How can I protect the painted surface of my wooden toy?
After painting, apply a clear, non-toxic sealant to protect the painted surface from scratches and wear. This will also make it easier to clean the toys if necessary.
7. Can I use other decorative materials besides paint?
Absolutely! You can explore various other materials like washi tape, fabric, or decoupage paper to add texture and visual interest to your wooden toys. Just ensure that they are safe for children.
8. How can I make my wooden toys more personalized?
You can personalize wooden toys by adding your child’s name, initials, or favorite designs using paint, stencils, or even woodburning tools. It adds a special touch and makes the toy uniquely theirs.
9. How do I clean and maintain the decorated wooden toys?
Wipe the toys with a soft cloth or sponge using mild soap and water. Avoid harsh chemicals or excessive moisture that may damage the paint or decorative elements. Ensure the toys are fully dried before storing them.
10. Can I repaint a wooden toy if I want to change the design?
Yes, you can repaint a wooden toy if you want to change the design or update its look. Simply sand off the previous paint, prime if necessary, and begin decorating with your new ideas.
Final Thoughts
Decorating your DIY wooden toys opens up a world of creativity and personalization. By following these tips and suggestions, you can transform simple wooden toys into unique and eye-catching pieces that your child will cherish. Whether you choose to paint, add decorative elements, or personalize them, these creative ideas will bring joy and excitement to both you and your little one. So, get your paintbrushes and imagination ready, and embark on a journey of making unforgettable memories through the art of decorating wooden toys!