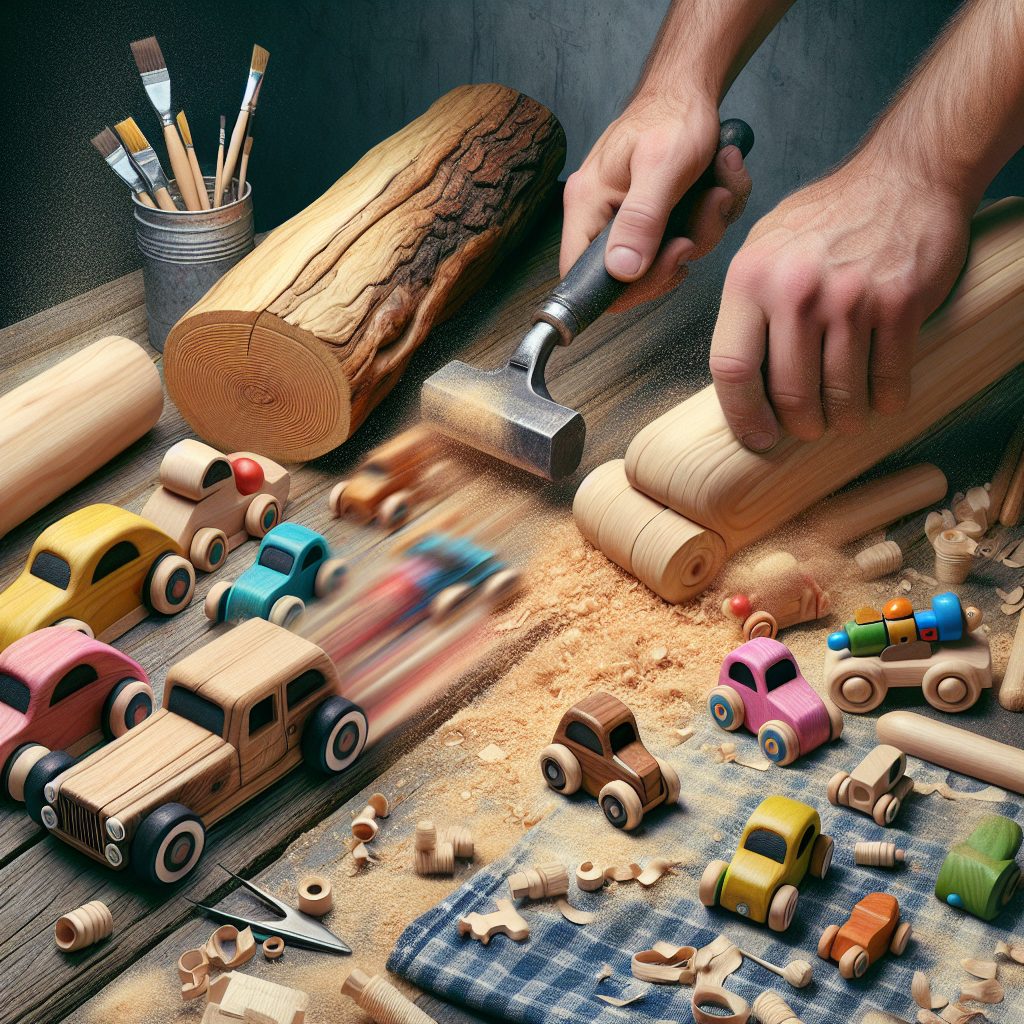
Creating Personalized Wooden Toys: A DIY Guide can be an incredibly rewarding hobby that combines creativity and craftsmanship. Wooden toys have a timeless appeal and are cherished for their durability and nostalgia. By handcrafting these toys, you can create unique and personalized gifts for loved ones or even start your own small business.
Wooden toys hold a special place in the hearts of many, as they evoke memories of simpler times and a connection to nature. Unlike mass-produced plastic toys, personalized wooden toys have a distinct charm and individuality that cannot be replicated. They are crafted with love and care, ensuring that each piece is one-of-a-kind. Additionally, wooden toys are known for their durability and longevity, making them ideal for passing down through generations.
In the upcoming part of this article, we will explore the key takeaways for creating personalized wooden toys. We will discuss the essential tools and materials needed for the DIY process, as well as provide step-by-step instructions for various toy designs. Whether you are a beginner or an experienced woodworker, these key takeaways will help you embark on a fulfilling journey of crafting timeless wooden toys. Stay tuned to discover the secrets of bringing joy and nostalgia to life through the art of woodworking.
Key Takeaways
1. Choose the right type of wood: Selecting the appropriate type of wood for your personalized wooden toys is crucial. Soft woods like pine are easy to work with, while hardwoods like oak or birch are more durable and long-lasting.
2. Use safe and child-friendly finishes: Ensure that the finishes you use on your wooden toys are non-toxic and safe for children to play with. Opt for natural finishes like beeswax or vegetable oils, avoiding varnishes or paints that may contain harmful chemicals.
3. Consider the age appropriateness of the toys: When designing and crafting personalized wooden toys, it’s important to consider the age of the child who will be playing with them. Avoid small parts or sharp edges that could pose a choking hazard for younger children.
4. Personalize the toys with unique touches: Personalizing wooden toys adds a special touch and makes them more meaningful. Consider using wood burning techniques to add names, initials, or unique designs to the toys, making them one-of-a-kind.
5. Emphasize safety throughout the process: Safety should be a top priority when creating personalized wooden toys. Pay careful attention to details like smooth edges, securely attached parts, and proper sanding to ensure the toys are safe for children to enjoy.
What are the Essential Steps for Creating Personalized Wooden Toys: A DIY Guide?
Choosing the Right Type of Wood
When it comes to creating personalized wooden toys, selecting the appropriate type of wood is crucial. Certain woods, such as pine or poplar, are ideal for beginners due to their softness and ease of workability. However, if you prefer a more durable option, hardwoods like maple or oak can withstand rough play and last for generations.
Gathering the Necessary Tools and Materials
Before diving into the DIY process, make sure you have all the required tools and materials. These might include a saw, chisels, sandpaper, wood glue, clamps, and a measuring tape. Additionally, don’t forget to gather safety equipment like goggles and gloves to protect yourself during the woodworking process.
Designing Your Personalized Toy
Creating a unique and personalized wooden toy involves designing it first. This step allows you to unleash your creativity and give the final product a personal touch. You can sketch your design on paper or utilize woodworking software to visualize the toy before proceeding to the next step.
Measuring and Cutting the Wood
Precision is key during the cutting process to ensure your wooden toy comes out as planned. Measure the required dimensions carefully and mark them on the wood. Using a saw, cut the wood according to your design. It is advisable to start with larger pieces and gradually refine the shape as you progress.
Shaping and Sanding the Toy
After cutting the wooden pieces to their desired shape, focus on refining the edges and surfaces. Use chisels or sandpaper to smooth out any rough edges or imperfections. Sand the entire surface of the toy to ensure it is safe and free from splinters. Gradually progress from a coarse grit to finer grit sandpaper for a polished finish.
Assembling and Joining the Parts
Once you have shaped and sanded all the individual components of the toy, it’s time to assemble them. Apply a suitable wood glue to the joints and use clamps to secure the pieces together tightly. Allow sufficient drying time as specified by the glue manufacturer before moving on to the next step.
Adding Personalized Details
To truly make your wooden toy unique, consider adding personalized details. This can include engraving the child’s name, painting patterns, or attaching decorative elements. Use non-toxic paints and finishes to ensure the toy remains safe for children to play with.
Applying a Protective Finish
After completing the assembly and personalization, it’s essential to protect the wooden toy’s finish. Apply a suitable non-toxic finish, such as beeswax or food-grade mineral oil, to enhance the durability and appearance of the toy. This helps prevent damage from moisture or regular wear and tear.
Tips for Creating Personalized Wooden Toys:
- Ensure safety precautions: Always wear protective gear and handle tools with care to avoid accidents.
- Start with simple designs: If you’re a beginner, begin with basic toy designs to build your woodworking skills gradually.
- Seek inspiration: Explore various sources like books, online tutorials, or existing wooden toys to gather ideas for your design.
- Consider the age of the child: Ensure the toy is age-appropriate and doesn’t have any small parts that can pose a choking hazard.
- Test the toy for safety: Before gifting the wooden toy, thoroughly inspect it for any potential hazards like sharp edges or loose parts.
- Personalize within limits: While customization is encouraged, be mindful of not compromising the functionality or structural integrity of the toy.
FAQ
1. Can I create personalized wooden toys even if I have no previous woodworking experience?
Absolutely! This DIY guide is designed to help both beginners and experienced woodworkers create personalized wooden toys. It provides step-by-step instructions and tips to ensure success, no matter your skill level.
2. Where can I find the necessary tools and supplies for creating personalized wooden toys?
You can find various woodworking tools and supplies at local hardware stores or online retailers specializing in woodworking. Additionally, there are specific hobby stores that carry a wide range of materials specifically for wooden toy making.
3. Are there any safety precautions to consider when working with wood and tools?
Yes, safety is crucial when working with wood and tools. It is essential to wear protective gear such as goggles, gloves, and a mask. Additionally, ensure proper ventilation in your workspace, especially when using paints, stains, or varnishes. Always follow the manufacturer’s instructions for each tool and material and use them responsibly.
4. How can I personalize wooden toys?
Personalizing wooden toys can be done in various ways. You can paint or stain them in your preferred colors, add unique designs, carve initials or names, or attach accessories such as ribbons or tags. Let your creativity guide you, and consider the recipient’s preferences when personalizing the toys.
5. Can I use reclaimed or recycled wood for creating personalized wooden toys?
Absolutely! Using reclaimed or recycled wood not only adds character to your toys but also promotes sustainability. Just ensure the wood is safe to work with and free from any harmful substances or pests. Sand it properly to create a smooth surface for your finished toy.
6. How can I ensure the wooden toys are safe for children to play with?
When creating wooden toys, it’s crucial to use non-toxic materials and finishes. Avoid small parts that can pose choking hazards, and ensure that all edges are smooth and free from splinters. Additionally, regularly inspect the toys for any damage or wear and make necessary repairs to maintain their safety.
7. Are there any specific age recommendations for the wooden toys I create?
Wooden toys can be created for children of various ages. However, it’s important to consider the complexity of the design and the potential choking hazards for younger children. It’s best to provide age recommendations based on the toy’s features and consult safety guidelines if needed.
8. Can I sell the personalized wooden toys I create?
Definitely! Once you’ve created your personalized wooden toys, you can sell them either locally or online. Ensure proper labeling and comply with any necessary regulations or certifications required for selling children’s toys. Keep in mind that quality craftsmanship and unique designs can make your toys more marketable.
9. What are some tips for achieving professional-looking finishes on the wooden toys?
To achieve professional finishes on your wooden toys, ensure proper sanding before applying any finishes. Use high-quality paints, stains, or varnishes and follow the manufacturer’s instructions for best results. Applying multiple thin coats rather than one thick coat can also enhance the overall appearance of the toys.
10. Can I incorporate other materials like fabric or metal into my wooden toys?
Absolutely! Wooden toys can be combined with other materials to add visual interest and functionality. You can attach fabric elements like clothing or soft features, use metal hardware like hinges or wheels, or even incorporate natural fibers like rope or twine. Experimentation with different materials can result in unique and exciting creations.
Final Thoughts
Creating personalized wooden toys through DIY projects is not only a rewarding experience but also provides a unique way to connect with loved ones or start a small business venture. The possibilities for creativity and customization are endless, allowing you to craft timeless toys that will bring joy to children for years to come.
Remember, the journey of creating personalized wooden toys requires patience, attention to detail, and a passion for craftsmanship. It’s important to embrace the learning process, seek inspiration from various sources, and continuously improve your skills. Whether you’re a novice or a seasoned woodworker, this DIY guide is your gateway to creating cherished wooden toys that hold sentimental value for both you and the lucky recipients.