Wooden toy making is a fascinating craft that allows both children and adults to explore their creative side while also enjoying the satisfaction of building something with their own hands. The art of creating toys from wood dates back centuries and has continued to evolve with modern techniques and designs. Not only does wooden toy making provide a unique and nostalgic play experience, but it also offers a range of benefits for children’s development, such as enhancing fine motor skills and encouraging imaginative play. In this beginner’s guide, we will explore the basics of wooden toy making at home, including the tools, materials, and techniques needed to get started.
One of the most appealing aspects of wooden toy making is its eco-friendly nature. Unlike plastic toys that contribute to harmful waste and pollution, wooden toys are sustainable and biodegradable. They have a timeless appeal that can be passed down through generations, creating cherished family heirlooms. Furthermore, wooden toys have a tactile quality that encourages sensory exploration and development. Their natural textures and weight offer a different playing experience compared to their mass-produced counterparts. Additionally, wooden toys allow children to engage in open-ended play, where they can use their imaginations and creativity freely. In the next section of this article, we will delve into the key takeaways for beginners interested in making their own wooden toys, including essential tools, safety considerations, and design ideas to inspire your creations.
Key Takeaways
1. Choose the right wood: To ensure the longevity and safety of your wooden toys, select a suitable type of wood such as hardwood, avoiding softwoods that may splinter easily.
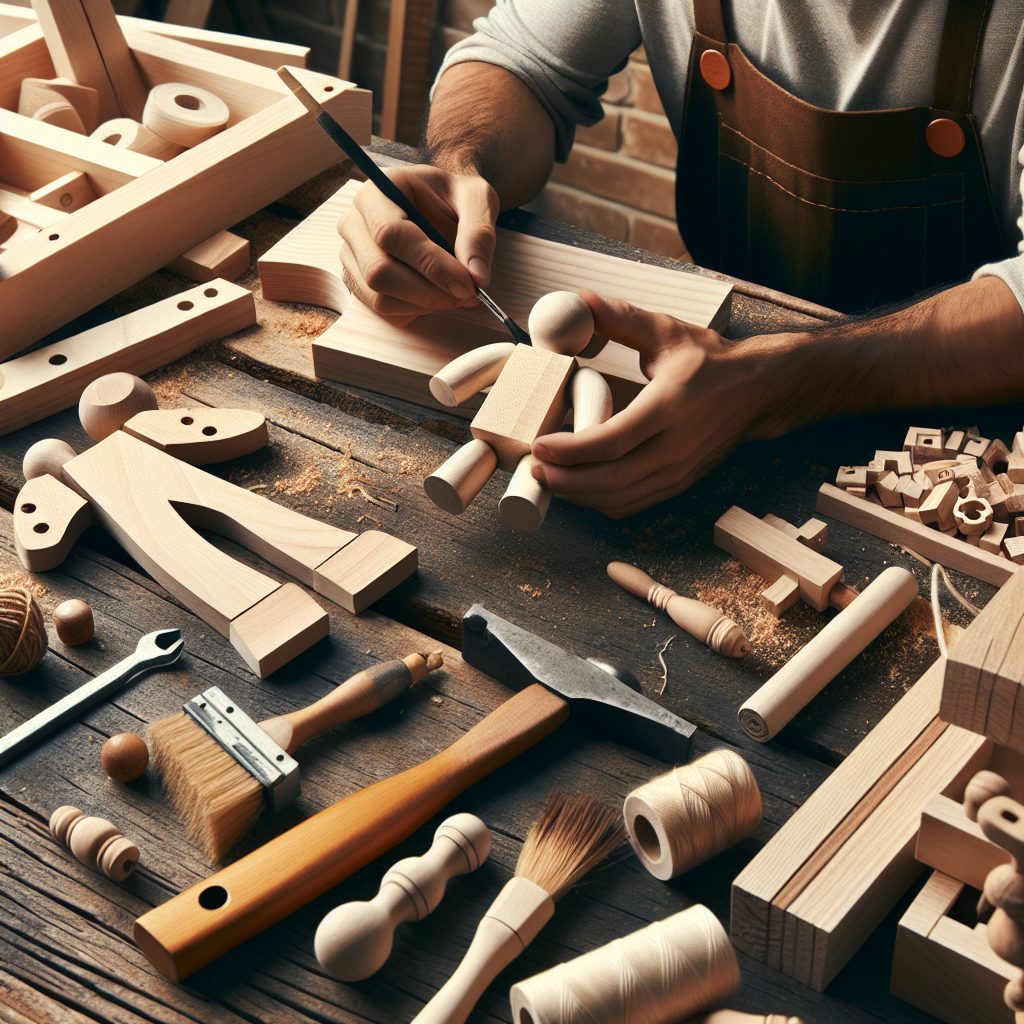
2. Basic tools and materials: Gather essential tools like a saw, sandpaper, drill, and wood glue, along with additional materials like non-toxic paint and varnish for finishing touches.
3. Safety first: Prioritize safety by using appropriate safety gear such as goggles and gloves, keeping tools out of reach of children, and thoroughly sanding all wooden surfaces to prevent splinters.
4. Start simple: Begin with straightforward designs such as blocks or simple puzzles before attempting more complex toy projects. This allows you to gain confidence and hone your woodworking skills.
5. Personalize and have fun: Enjoy the creative process by personalizing your wooden toys with unique designs or engravings. Remember to have fun and embrace the joy of crafting toys for yourself or loved ones.
How to Make Wooden Toys at Home: A Beginner’s Guide
Choosing the Right Wood
When it comes to making wooden toys at home, the first step is to choose the right type of wood. Opt for hardwoods such as maple, beech, or oak, as they are durable and long-lasting. Avoid softwoods like pine, as they might not withstand the wear and tear of playtime. Additionally, ensure that the wood is free from knots and cracks, as these can weaken the structure of the toy.
Gathering the Essential Tools
To embark on your wooden toy making journey, you’ll need some essential tools. These include a table saw, jigsaw, drill press, chisels, sandpaper in various grits, and non-toxic wood glue. Investing in high-quality tools will make the process easier and ensure precision in your creations. Don’t forget to wear goggles, gloves, and ear protection for your safety.
Selecting Safe Finishes
When making wooden toys for children, it’s crucial to choose safe finishes that won’t be harmful if ingested. Opt for non-toxic, food-grade finishes such as beeswax or mineral oil. These finishes not only protect the wood but also enhance its natural beauty. Avoid using varnishes or paints that contain harmful chemicals, as they can pose health risks.
Designing and Planning Your Toy
Before diving into the construction process, it’s essential to plan and design your wooden toy. Consider the age group you’re targeting and the level of complexity you’re comfortable with. Sketch your ideas on paper or use design software to visualize the final product. Break down the toy into smaller components to make the construction process more manageable.
Measuring and Cutting the Wood
Accurate measurements are crucial for a well-constructed wooden toy. Use a ruler or measuring tape to mark the dimensions on the wood before cutting. Take your time with precise cuts, ensuring smooth edges and clean lines. Remember to measure twice and cut once to avoid wastage of expensive wood.
Assembling and Joining the Pieces
Once the individual pieces are cut, it’s time to assemble and join them together. Use wood glue to adhere the parts securely. Depending on the design, you may need to employ different joining techniques such as mortise and tenon, dovetail, or simple butt joints. Pay close attention to ensuring stability and strength in the assembled toy.
Sanding and Finishing Touches
After the wooden toy is assembled, take the time to sand it thoroughly. Start with a coarse grit sandpaper and gradually move to finer grits for a smooth and polished surface. Round any sharp edges or corners for safety purposes. Apply the chosen non-toxic finish and allow it to dry completely before allowing children to play with the toy.
Tips for Safety and Durability
- Regularly inspect the wooden toy for any signs of wear or damage, and fix or replace any loose parts.
- Avoid leaving wooden toys outdoors or in damp areas, as moisture can cause warping or rotting.
- Store wooden toys in a cool, dry place to maintain their quality and prevent mold or mildew growth.
- Encourage supervised play to minimize accidents and ensure the longevity of your handmade wooden toys.
Frequently Asked Questions
1. How do I start making wooden toys at home?
To start making wooden toys at home, you will need some basic tools such as a saw, sandpaper, drill, and various sizes of wood. It’s also important to have a design or plan in mind before you begin. You can find plenty of design ideas online or in books on wooden toy making.
2. What types of wood are suitable for making toys?
When making toys, it’s important to use non-toxic and durable woods. Maple, birch, cherry, and walnut are all excellent choices. Avoid softwoods like pine, as they are prone to splintering and less durable.
3. Do I need woodworking experience to make wooden toys?
No, you don’t need previous woodworking experience to start making wooden toys. However, having some basic knowledge of woodworking techniques can be helpful. There are also many beginner-friendly toy plans available that provide step-by-step instructions.
4. What safety precautions should I take when making wooden toys?
Safety should always be a top priority when working with tools and materials. Make sure to wear protective eyewear and gloves, and keep your work area well-ventilated. Follow the instructions closely and use tools properly to minimize the risk of accidents.
5. How can I ensure the toys are safe for children?
When making toys for children, it’s important to use non-toxic finishes and avoid any sharp edges or small parts that could be a choking hazard. Sand the surfaces thoroughly to ensure they are smooth and free from splinters. Regularly inspect the toys for any signs of wear or damage.
6. Can I sell the wooden toys I make at home?
Yes, you can sell the wooden toys you make at home. However, it’s important to comply with any local regulations regarding the sale of handmade items. It’s also a good idea to thoroughly test the toys for safety before selling them.
7. How can I make the wooden toys more visually appealing?
To make wooden toys more visually appealing, you can apply finishes or paint them in vibrant colors using non-toxic paints. You can also experiment with different shapes, patterns, and textures to make your toys unique and eye-catching.
8. Are there any resources or communities for wooden toy makers?
Yes, there are resources and communities available for wooden toy makers. Online forums and social media groups cater specifically to wooden toy making enthusiasts. These platforms can provide valuable tips, inspiration, and a supportive community to connect with.
9. Can I make wooden toys without power tools?
Absolutely! While power tools can make the process faster and more efficient, it’s possible to make wooden toys without them. Hand tools like chisels, sandpaper, and hand saws can still produce beautiful and functional toys.
10. Are there any beginner-friendly wooden toy projects I can start with?
Yes, there are several beginner-friendly wooden toy projects you can start with. Building simple blocks, puzzles, or pull-along animals are great options for beginners. These projects will help you develop essential woodworking skills while creating fun toys for children.
Final Thoughts
Embarking on the journey of wooden toy making at home can be incredibly rewarding. Not only does it allow you to tap into your creativity, but it also provides the joy of crafting unique toys for loved ones or even starting a small business. Remember to prioritize safety, use non-toxic materials, and constantly learn and experiment with different designs. With practice and perseverance, you’ll soon develop your skills and create beautiful wooden toys that bring happiness to children and adults alike.
Wooden toy making is a timeless craft that connects us to the past while offering an eco-friendly alternative to mass-produced toys. By investing time and effort into this hobby, you not only create cherished toys but also contribute to a more sustainable and personal way of play. So, gather your tools, embrace your creative spirit, and let your imagination run wild as you embark on the wonderful world of wooden toy making right from the comfort of your home.