Mastering Wooden Toy Restoration: Expert Tips
Wooden toys hold a special place in the hearts of adults and children alike. Their timeless charm and durability make them cherished heirlooms that can be passed down through generations. However, over time, these beloved toys can lose their luster or suffer damage. This is where mastering the art of wooden toy restoration becomes essential. By acquiring expert tips and techniques, you can breathe new life into these toys and preserve their beauty for years to come.
Restoring wooden toys requires more than just a basic understanding of repairs. It involves a deep appreciation for the craftsmanship and history behind these cherished playthings. Additionally, the process of restoration brings numerous benefits beyond just restoring the toy’s appearance. It allows you to connect with the past, unearthing stories and memories associated with the toy. Furthermore, it provides a sense of fulfillment and accomplishment as you witness the transformation of a worn-out toy into a treasured masterpiece.
In the upcoming section, we will delve into the key takeaways to help you master the art of wooden toy restoration. These expert tips will guide you through the process step by step, ensuring that you have the knowledge and skills necessary to revive old toys with finesse. Whether you are a seasoned restorer or a beginner looking to embark on this rewarding journey, these insightful tips will equip you with the tools and techniques needed to breathe new life into wooden toys and preserve their beauty for years to come.
Key Takeaways
1. Understand the importance of wooden toy restoration: Wooden toys hold sentimental and historical value, making restoration a rewarding and worthwhile endeavor.
2. Assess the condition of the toy: Before starting any restoration process, carefully evaluate the toy’s condition to determine the extent of the damage and the best approach to take.
3. Clean and repair the toy: Begin by thoroughly cleaning the toy using gentle methods, such as mild soap and water, to remove dirt and grime. Then, proceed to repair any loose or broken parts using non-toxic glue or wooden dowels.
4. Preserve the originality of the toy: Unless there is significant damage, it is best to preserve the toy’s original paint and finish. Lightly sand the surface to remove scratches and imperfections, and apply a clear protective coating to enhance its durability.
5. Store and display the toy properly: After restoration, storing the toy in a cool and dry place away from direct sunlight will help maintain its condition. When displaying the toy, avoid placing it near heat sources or in areas prone to humidity to prevent damage.
How can I master wooden toy restoration with expert tips?
Choosing the Right Wooden Toy Restoration Project
When it comes to mastering wooden toy restoration, the first step is selecting the right project to work on. Consider the condition of the toy, the complexity of the restoration required, and your level of expertise. It’s essential to start with a project that is manageable and aligns with your skills.
Gathering the Necessary Tools and Materials
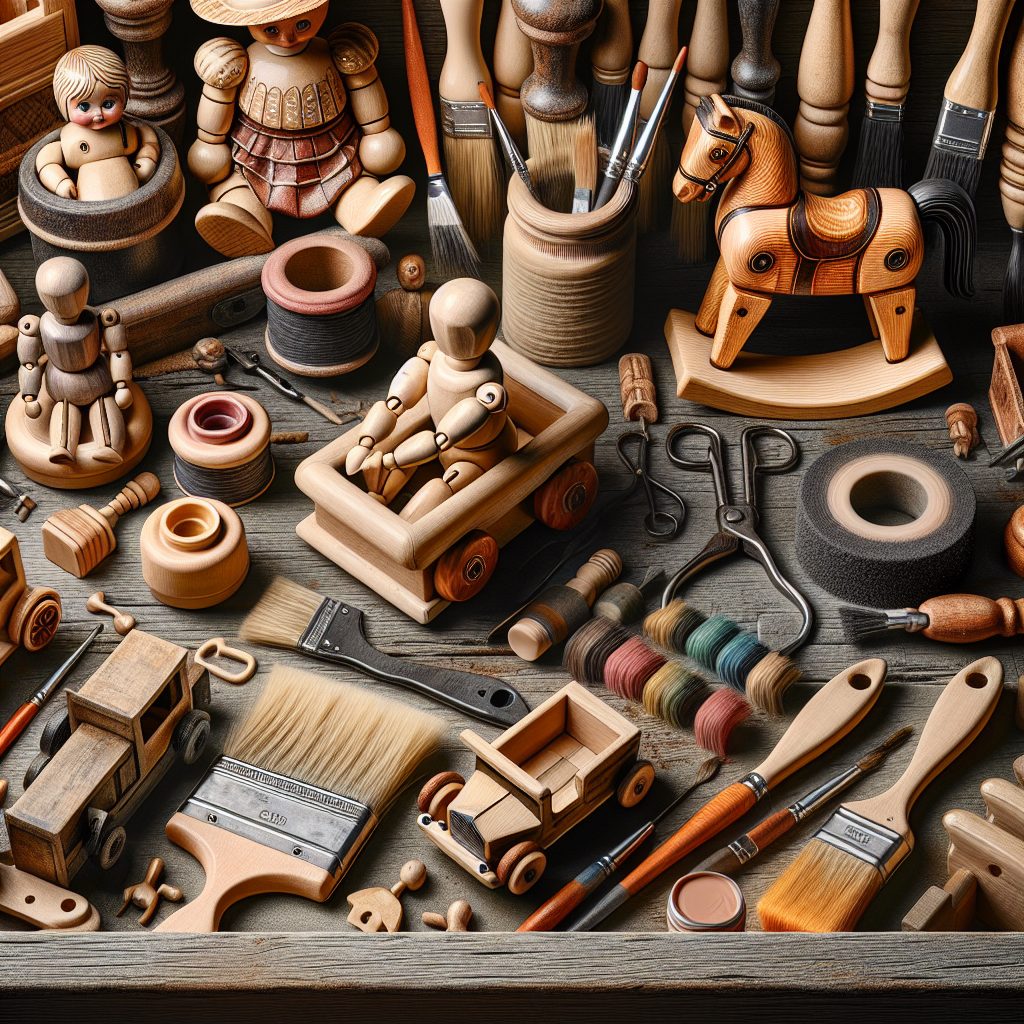
Before diving into the restoration process, make sure you have all the necessary tools and materials. Some common tools for wooden toy restoration include sandpaper, wood glue, clamps, chisels, and sharp cutting tools. Additionally, you may need varnish or paint, brushes, and a dust mask for safety purposes. Prepare your workspace and have everything within reach before starting.
Assessing and Documenting the State of the Toy
Take the time to thoroughly inspect the wooden toy and document its current state. Look for any cracks, chips, or missing pieces. Understanding the extent of the damage will help you plan the restoration process more effectively. Take clear photographs and notes to reference later on.
Repairing and Restoring the Wooden Toy
Now that you have a comprehensive understanding of the toy’s condition, it’s time to commence the restoration. Begin by addressing any structural issues, such as loose joints or broken parts. Carefully disassemble the toy if necessary and make any repairs using appropriate techniques and adhesives.
Next, move on to the surface restoration. Sand away any rough edges or old finishes, working your way through different grits of sandpaper for a smooth finish. Fill in any cracks or gaps with wood filler, ensuring a seamless surface. If desired, apply a new coat of paint or varnish, being mindful of preserving the toy’s original charm and features.
Preserving and Maintaining the Restored Toy
Once the wooden toy restoration is complete, it is crucial to take steps to preserve and maintain its condition. Avoid exposing the toy to excessive sunlight or extreme temperatures, as it can cause warping or fading. Regularly clean and dust the toy, using mild soap and water when necessary. Applying a protective layer of wax or varnish can further safeguard the restored toy from wear and tear.
Guides for Mastering Wooden Toy Restoration: Expert Tips
- Take your time and be patient throughout the restoration process.
- Research and learn about different wood types and their specific care requirements.
- Join online forums or communities dedicated to wooden toy restoration to gather insights and advice from experienced enthusiasts.
- Practice different restoration techniques on small, less valuable toys before tackling more valuable or sentimental pieces.
- Document each step of the restoration process to track your progress and refer back to it for future projects.
- Consider seeking professional help for intricate restorations or valuable antique toys.
- Always prioritize safety by wearing protective gear such as goggles and gloves when using power tools.
- Take breaks when needed to avoid fatigue and maintain focus.
Frequently Asked Questions
1. Can any wooden toy be restored?
Yes, most wooden toys can be restored with the right techniques and tools. However, the extent of restoration will depend on the condition of the toy and the skills of the restorer.
2. What tools are essential for wooden toy restoration?
Some essential tools for wooden toy restoration include sandpaper, wood glue, clamps, chisels, and paintbrushes. These tools help in removing old finishes, repairing broken parts, and applying new finishes.
3. How do I remove old paint or varnish from a wooden toy?
To remove old paint or varnish, you can use chemical strippers or sandpaper. Apply the chosen method carefully, following the instructions, and ensuring proper ventilation. Test a small area first to avoid damaging the toy.
4. How do I repair cracks in wooden toys?
To repair cracks in wooden toys, apply wood glue to the cracked area, and use clamps to hold the pieces together until the glue dries. Once the glue is dry, sand the area to make it smooth.
5. What is the best way to preserve the original finish of a wooden toy?
The best way to preserve the original finish is by gently cleaning the toy with a mild soap and water solution, avoiding harsh chemicals. Applying a thin coat of wax or oil can also help protect the wooden surface.
6. How can I fix loose joints or movable parts in a wooden toy?
If the joints or movable parts of a wooden toy are loose, you can use wood glue or epoxy to reinforce them. Apply the adhesive to the loose area and let it dry according to the instructions.
7. Can I repaint a wooden toy myself?
Yes, you can repaint a wooden toy yourself. Start by sanding the surface to remove old paint and create a smooth base. Then, apply primer followed by paint suitable for wooden surfaces. Finish with a clear coat for added protection.
8. Is it necessary to remove all the scratches from a wooden toy during restoration?
No, it is not necessary to remove all scratches from a wooden toy during restoration. Some light scratches can add character, but deeper scratches or gouges can be filled using wood filler before refinishing.
9. How can I ensure the safety of the restored wooden toy?
To ensure the safety of the restored wooden toy, make sure all glued parts are secure, check for loose screws or nails, and ensure there are no sharp edges or splinters. Avoid using toxic finishes or paints that may be harmful to children.
10. Can I sell restored wooden toys?
Yes, you can sell restored wooden toys. There is a market for antique and collectible toys, and many people appreciate the art of wooden toy restoration.
Final Thoughts on Mastering Wooden Toy Restoration: Expert Tips
Mastering the art of wooden toy restoration can be a rewarding and fulfilling hobby. It allows you to breathe new life into cherished toys, preserving their sentimental value and making them enjoyable for future generations. Remember to approach each restoration project with care, patience, and attention to detail. With the right techniques and tools, along with a love for craftsmanship, you can transform worn-out wooden toys into treasures that bring joy to both young and old.
Furthermore, wooden toy restoration is not only about aesthetics but also about safety. Ensure that the toys are free from any potential hazards, using child-safe materials and finishes. By restoring wooden toys, you contribute to the preservation of traditional play experiences and promote sustainability by reducing waste. So, embrace the art of mastering wooden toy restoration and let your creativity shine while connecting generations through the timeless charm of classic wooden toys.